
How to Clean Laptop Screen Safely: A Quick Guide
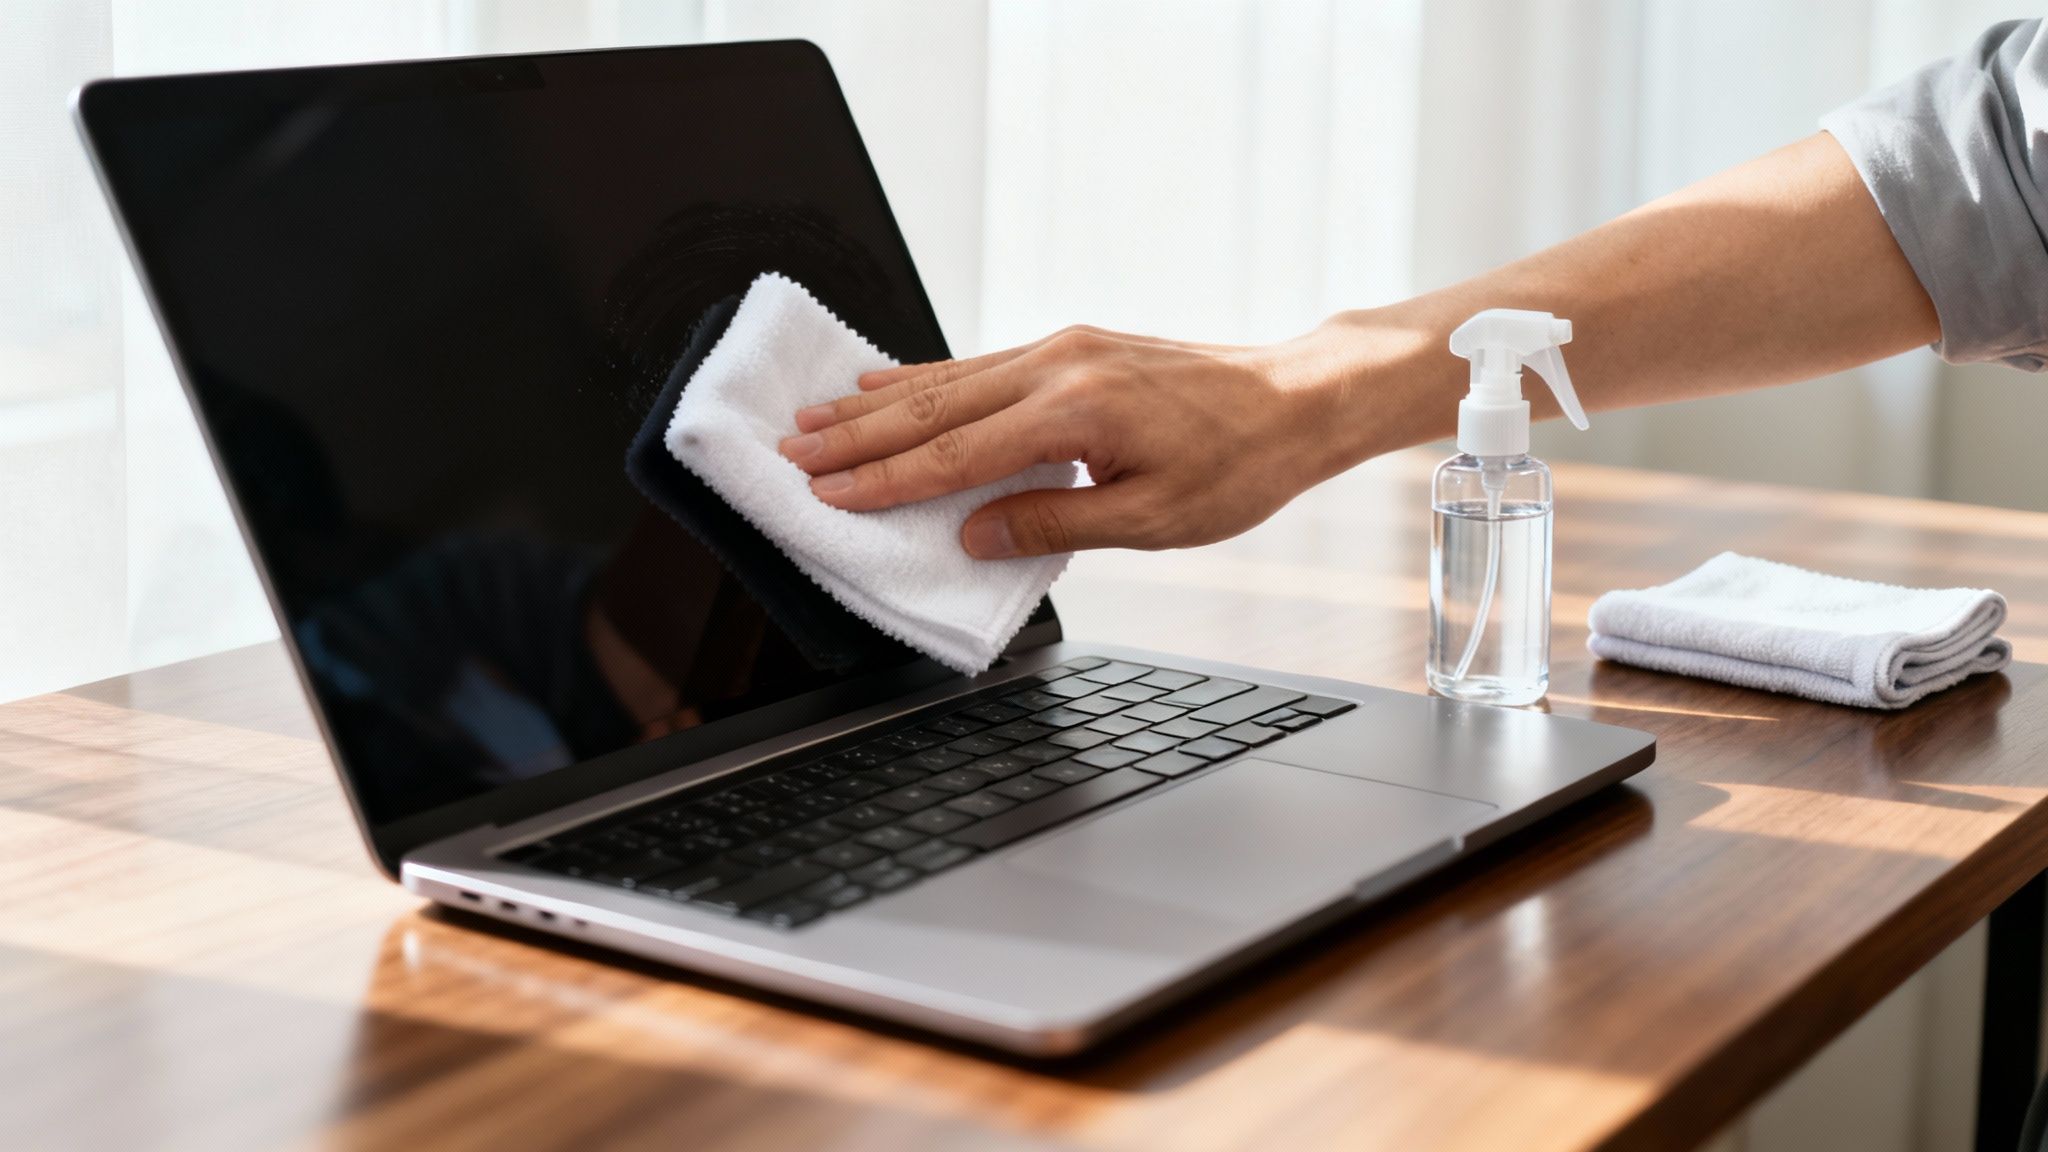
Before you even think about wiping down your screen, let's get one thing straight: the secret to a safe, streak-free clean is surprisingly simple. You really only need two things: a good microfiber cloth and a little distilled water. Forget about the Windex or that roll of paper towels. This simple pair is what the pros use to get a perfect finish without causing any damage.
Your Essential Toolkit for a Spotless Laptop Screen
Getting the right tools together is half the battle, but don't worry—you don’t need to buy some fancy, overpriced kit. The most effective items for the job are probably sitting in your house right now. The main goal here is to get rid of fingerprints, dust, and grime without stripping away the delicate coatings on your screen.
With so many of us working from home or taking classes online, keeping our screens clean has become a real priority. It's no surprise the market for computer cleaning tools is projected to hit USD 1.5 billion by 2025. What is surprising is how many people get it wrong. Some reports suggest that a staggering 70% of screen failures are caused by improper cleaning, like using regular tap water that leaves behind damaging mineral spots. You can read the full research on computer cleaner market trends to see just how much hygiene awareness has shot up.
The Must-Haves
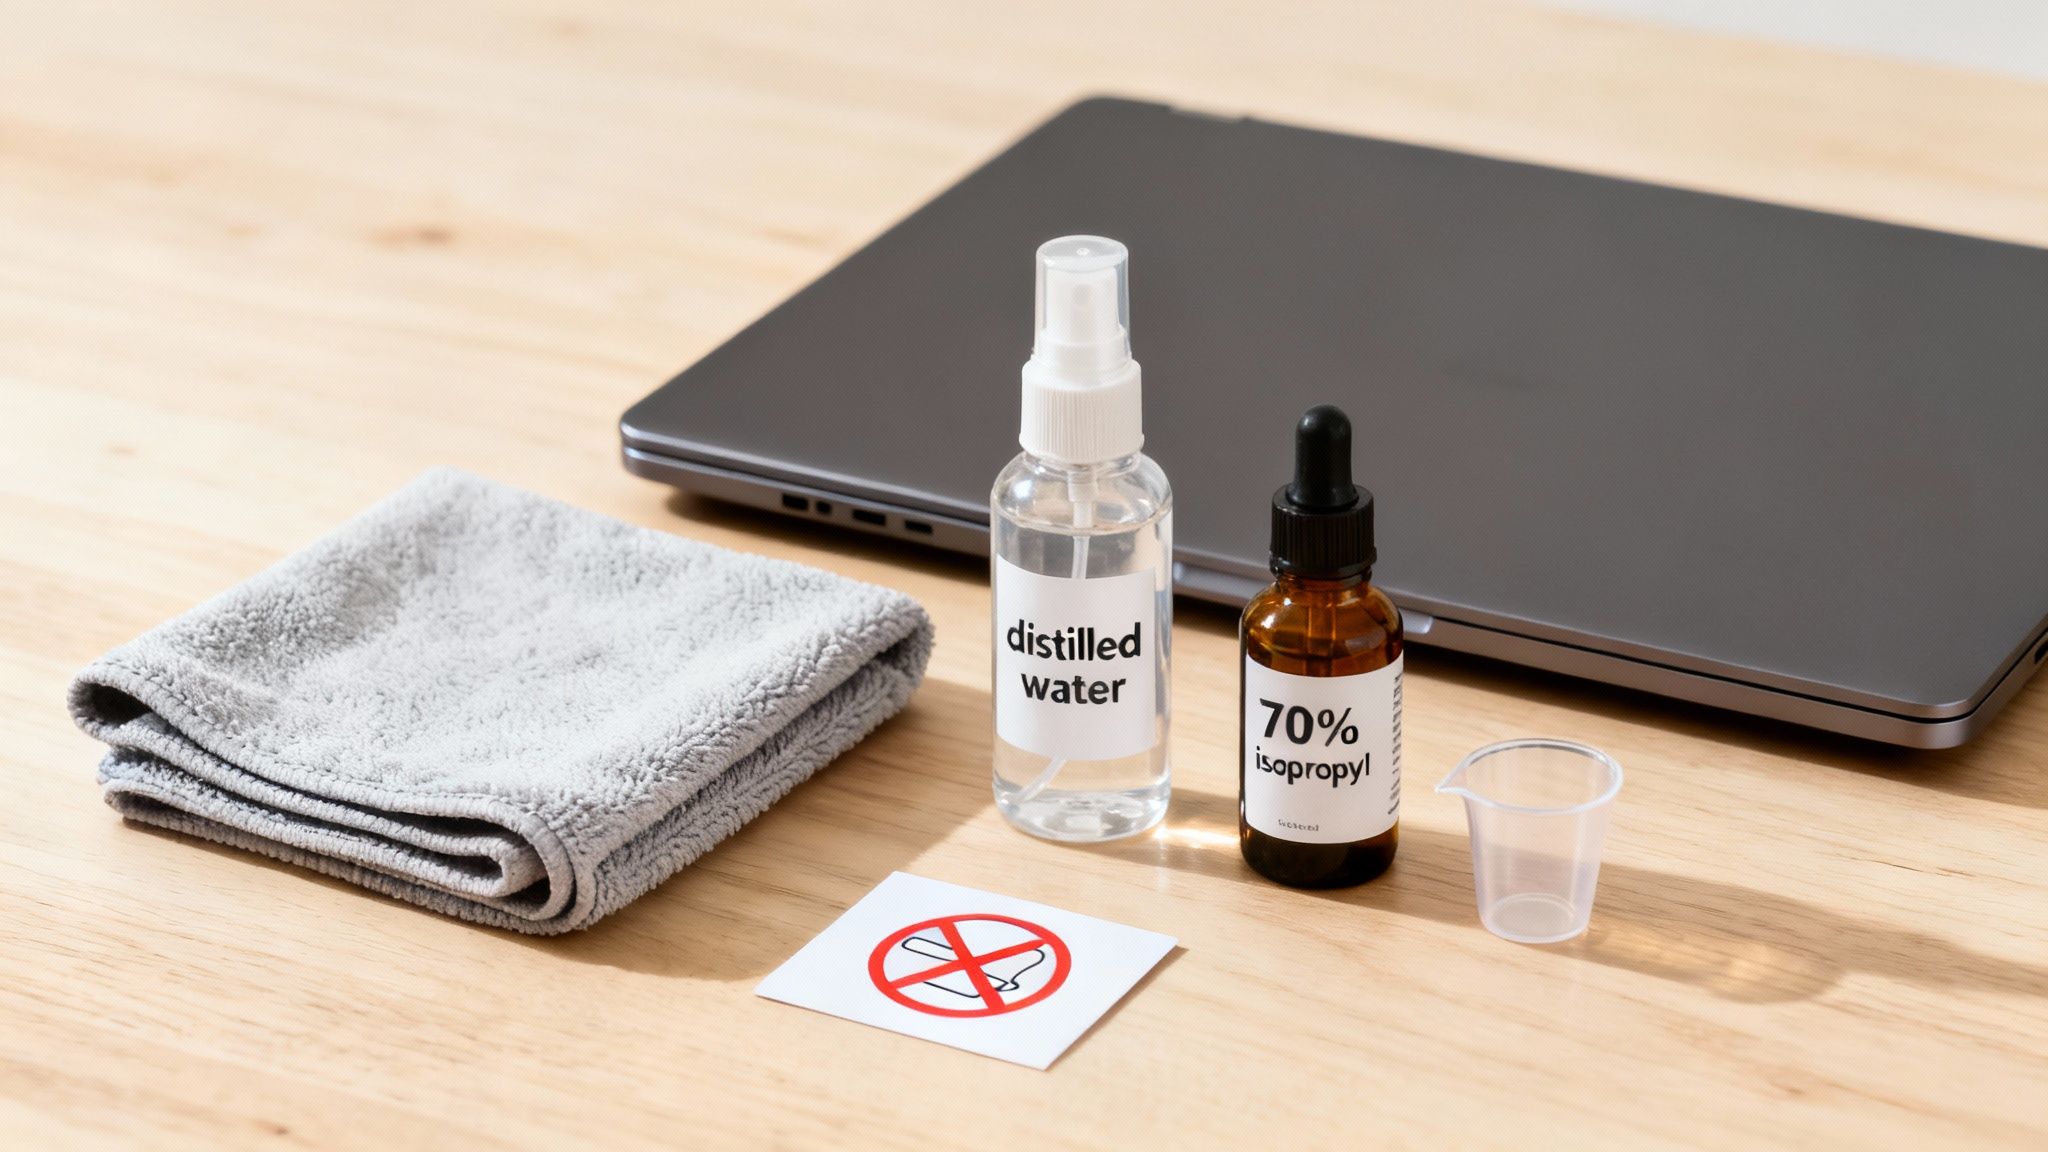
Microfiber Cloths: This is your most important tool. The ultra-fine fibers are brilliant at trapping dust and absorbing oils without leaving lint or, worse, scratching the surface. I recommend having at least two on hand—one for the damp wipe-down and a second, dry one for buffing away any remaining moisture.
Distilled Water: For your cleaning solution, start with plain old distilled water. Unlike tap water, it's completely free of minerals that can leave behind annoying streaks and cloudy deposits.
For those extra-stubborn smudges, you can mix up a 50/50 solution of distilled water and basic white vinegar. It works wonders. Another option for oily spots is a solution with 70% isopropyl alcohol, but use it sparingly and always check your laptop manufacturer's cleaning guidelines first. Some screen coatings don't play well with alcohol.
What to Absolutely Avoid
This is just as important as what to use. Please, steer clear of any paper products. That means no paper towels, no tissues, no exceptions. They feel soft to us, but their wood fibers are abrasive enough to create permanent micro-scratches on your screen. The same goes for old t-shirts or dish rags; they often hold onto tiny dirt particles that can scratch the surface and usually leave a trail of lint behind.
When it comes to the liquid cleaners, never, ever use:
- Household glass cleaners (like Windex)
- Abrasive cleaners or anything with a gritty texture
- Tap water
To make it crystal clear, here’s a quick guide on what to grab and what to leave on the shelf.
Screen Cleaning Supplies Do's and Don'ts
| Safe to Use (Do) | Why It Works | Avoid at All Costs (Don't) | Why It's Harmful |
|---|---|---|---|
| Microfiber Cloth | Tiny fibers trap dust and oil without scratching or leaving lint. | Paper Towels / Tissues | Wood fibers are abrasive and can cause permanent micro-scratches. |
| Distilled Water | Free of minerals, so it cleans without leaving streaks or deposits. | Tap Water | Contains minerals that leave behind cloudy residue and spots. |
| 50/50 White Vinegar & Distilled Water | A gentle, effective DIY solution for breaking down grime and oils. | Household Glass Cleaners (Windex) | Often contain ammonia, which can strip anti-glare and anti-reflective coatings. |
| 70% Isopropyl Alcohol (Sparingly) | Excellent for cutting through stubborn oils, but check manufacturer advice first. | Abrasive Powders / Cleaners | Can physically scratch and permanently damage the screen surface. |
Ultimately, using the right supplies is just as fundamental as picking the right device in the first place. If you're still in the market or thinking about an upgrade, our guide on how to choose the right laptop can help you find the perfect fit.
Getting Your Laptop Ready for a Safe Cleaning
Before you even grab a cloth, a little prep work is non-negotiable. I've seen too many people try to clean a running laptop, and it's a recipe for disaster—streaks, potential shorts, you name it.
First things first: shut it down completely. Don't just close the lid or put it to sleep. Go through the full shutdown process.
Once it's off, unplug it from the power adapter and disconnect everything else—your mouse, external drives, any USB devices. This completely removes any risk of electrical damage from a stray drop of moisture. Plus, a powered-off, black screen makes every single speck of dust and greasy fingerprint pop. It’s the perfect canvas for a deep clean.
Give It a Moment to Cool Down
This next step is one people often skip, and it's a crucial one. Let your laptop sit for a few minutes and cool down. If you try to clean a warm screen, your cleaning solution will evaporate almost instantly, leaving behind the exact kind of ugly, stubborn streaks you're trying to get rid of.
I always tell people to think of it like a hot pan right off the stove—you wouldn't douse it in cold water. The same logic applies here. A cool, powered-down device is your secret weapon for a flawless, streak-free finish. A little bit of patience goes a long way.
Speaking of power, proper maintenance goes beyond just cleaning. To get the most out of your battery, take a look at our guide on how to extend laptop battery life.
The Right Technique for a Streak-Free Finish
With your laptop prepped and your tools at the ready, it's time to actually clean the screen. The secret to getting that perfect, streak-free shine isn’t about scrubbing harder—it's all about a gentle, methodical approach. This process ensures you get rid of smudges without risking damage from too much pressure or moisture.
This visual guide lays out the simple but absolutely essential prep work you need to do before a single wipe.
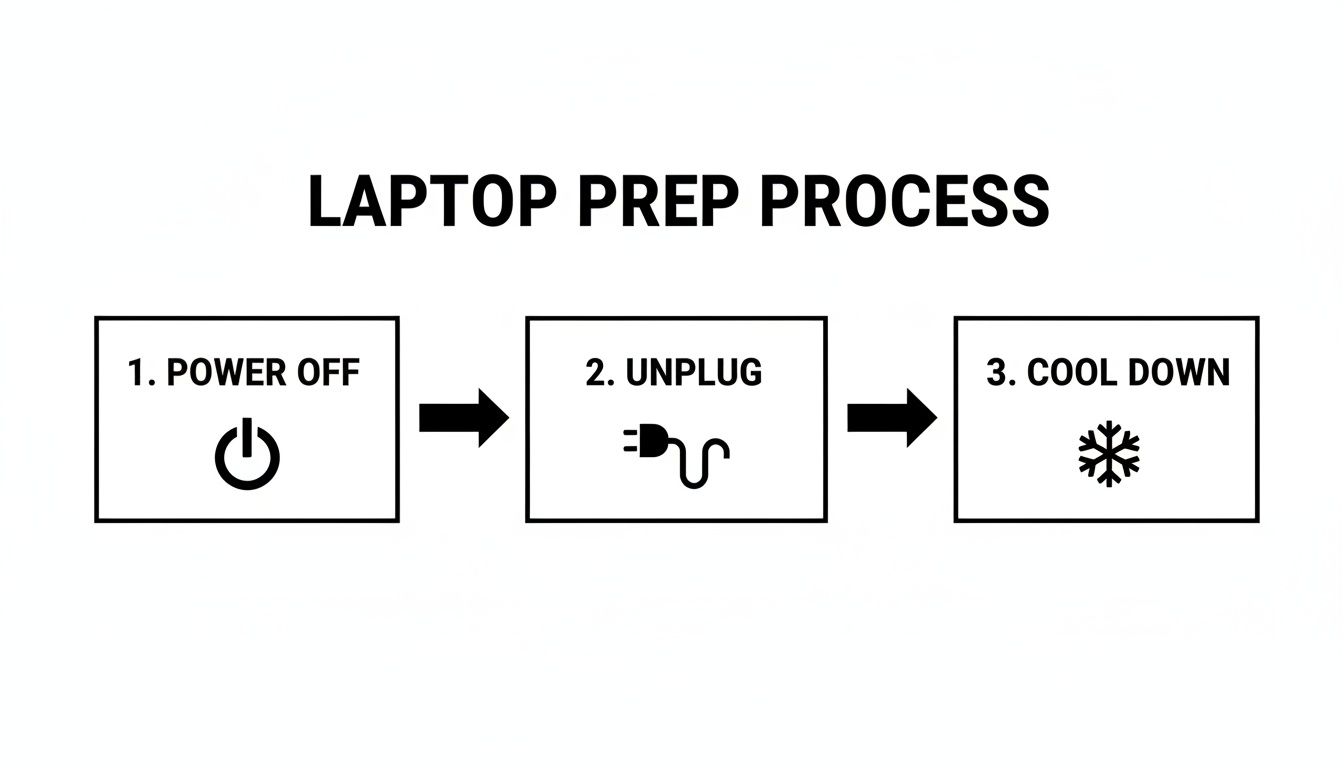
This three-step sequence—powering off, unplugging, and letting it cool down—is the bedrock of cleaning your screen safely and avoiding any nasty electrical surprises.
Start with a Dry Wipe
Before you even think about introducing moisture, always start with a dry microfiber cloth. Gently wipe the screen from top to bottom in one consistent direction. This first pass is crucial for lifting away all the loose dust, pet hair, and other particles just sitting on the surface.
If you skip this, you risk turning that loose dust into a gritty, abrasive paste the moment you add liquid, which can lead to micro-scratches. Think of it like sweeping the floor before you mop; it gets the big stuff out of the way so you can deal with the real grime.
How to Use a Cleaning Solution (Without Causing Damage)
Okay, now it's time to tackle those fingerprints and smudges. This is where most people make the biggest mistake: never, ever spray any liquid directly onto your screen. It's so easy for moisture to seep under the bezel and fry the delicate electronics inside.
Instead, lightly dampen a clean corner of your second microfiber cloth with your chosen cleaning solution. The cloth should feel just barely moist, not wet. A good rule of thumb? If you can wring even a single drop out of it, it’s far too saturated.
Use a gentle, consistent motion. Either wipe in broad horizontal strokes from side to side, or use vertical strokes from top to bottom. Avoid scrubbing in small, aggressive circles—that's a surefire way to leave streaks and create an uneven finish.
Final Touches for a Perfect Polish
Don’t forget the corners and edges where dust and grime love to collect. Use a dry section of your cloth, or grab a fresh one, to gently buff away any lingering moisture. This final polish is what gets rid of any faint streaks and ensures the screen is completely dry before you power it back on.
This advice isn’t just my own; it aligns perfectly with longstanding guidelines from manufacturers like Apple and Dell, who constantly warn against letting moisture get anywhere near ports. In fact, some studies have linked around 15% of laptop failures to liquid damage. That's why being careful with your microfiber cloth is so important, especially since liquid cleaners currently hold a 35.2% market share because of how well they work on modern screens.
And if you're a fan of display technology, you might find our guide on innovative color e-ink screens a fascinating read.
Tackling Tough Marks and Tailoring Your Technique for Different Screens
We've all been there. You finish wiping down your screen, and one stubborn fingerprint or oily smudge just refuses to budge. The temptation is to scrub harder, but that's a mistake. The real solution is a bit more finesse, not more force.
Instead of going over the entire screen again, zero in on that one problem area. Using your barely damp microfiber cloth, apply very light pressure in small, circular motions directly on the smudge. This targeted approach focuses the cleaning right where it's needed. Give it a moment to dry, and if it's still there, repeat the process. Patience is your best friend here.
How to Clean Different Screen Finishes
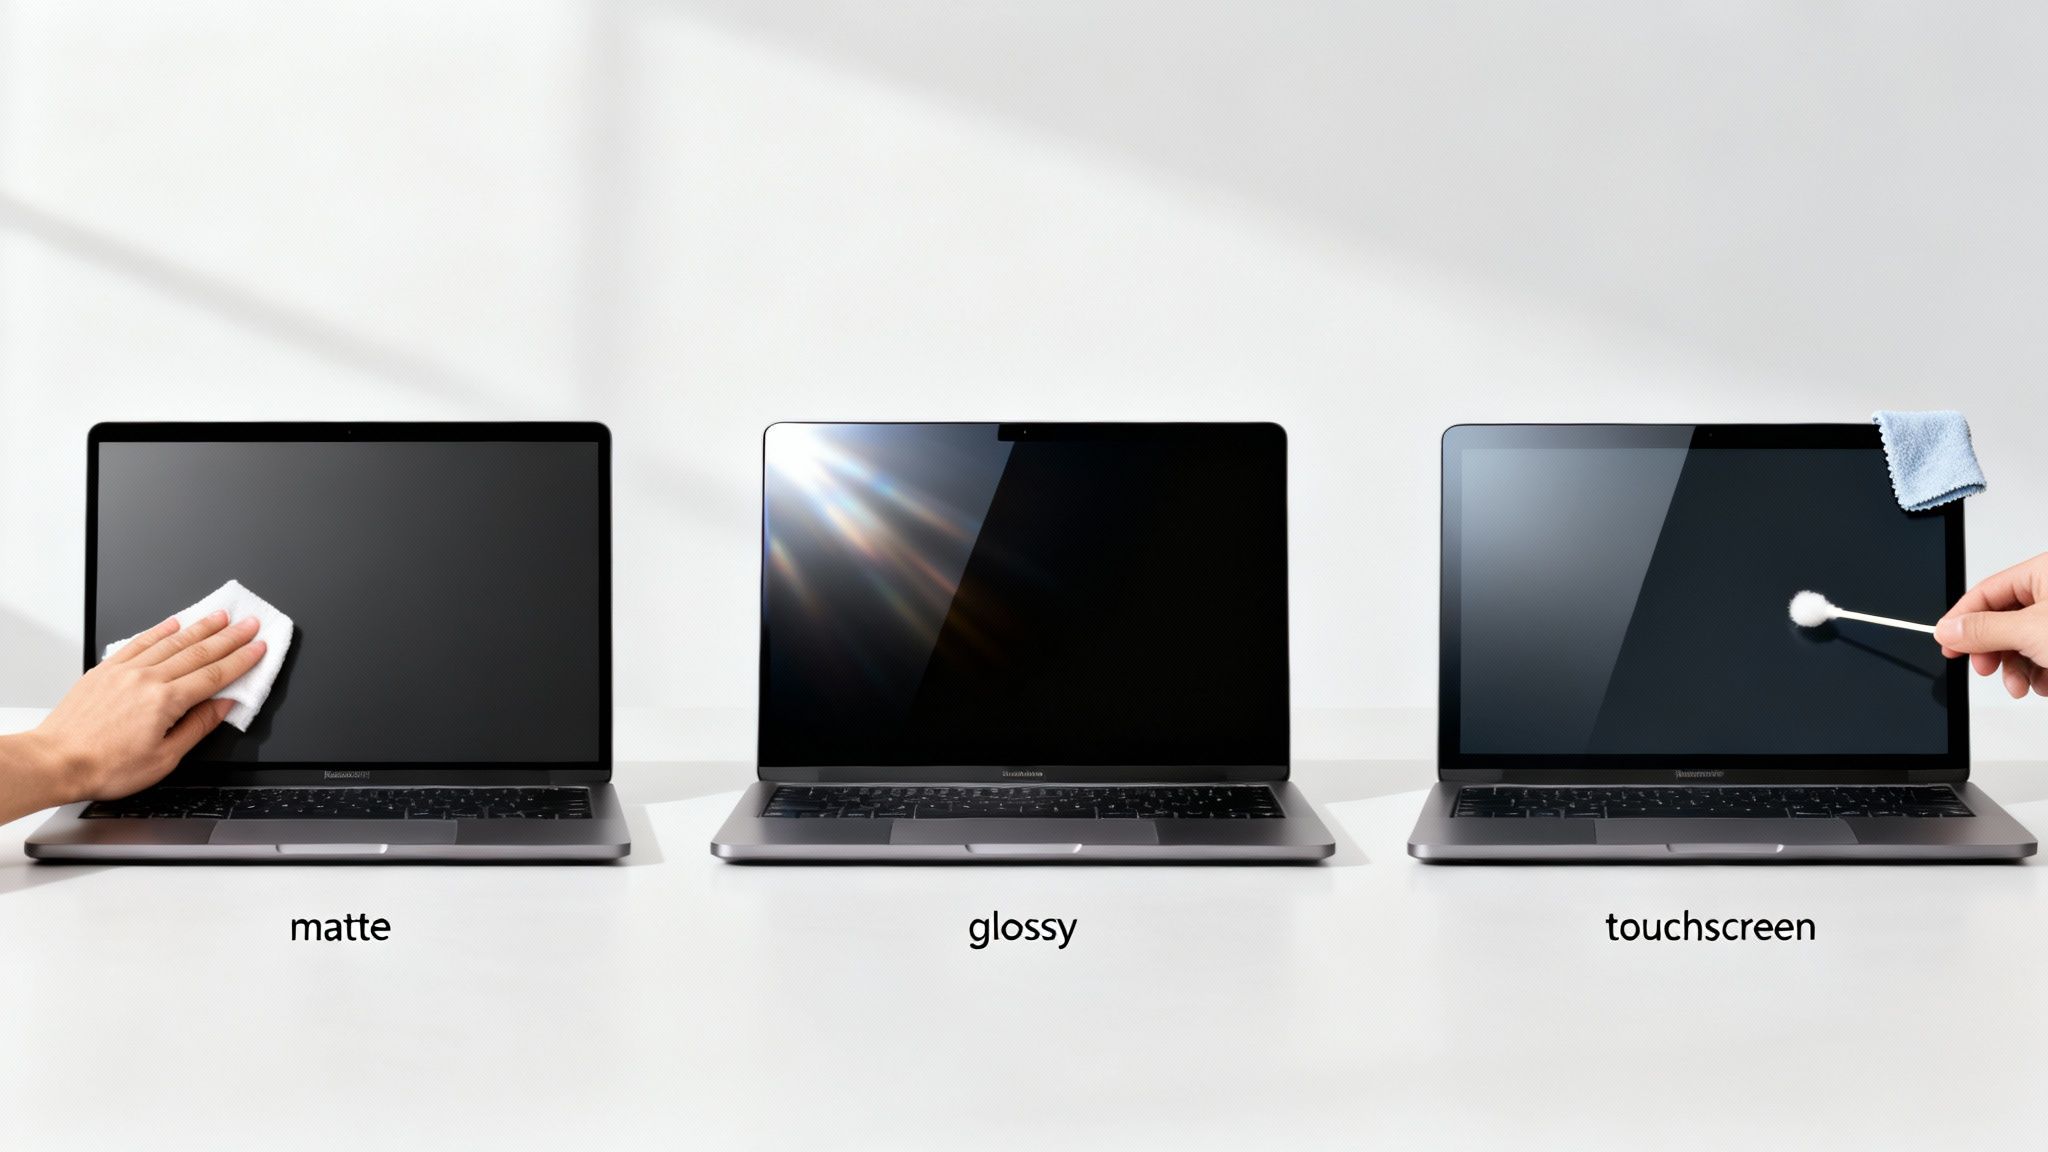
Laptops don't use a one-size-fits-all screen, so your cleaning method shouldn't be, either. Whether you have a glossy, matte, or touchscreen display, each finish requires a slightly different approach to avoid accidental damage.
Glossy Screens: Known for their vibrant colors, these screens are also notorious fingerprint and glare magnets. Thankfully, they're pretty resilient. For really tough grime, a 50/50 mix of distilled water and plain white vinegar usually does the trick without causing harm.
Matte (Anti-Glare) Screens: I love these for working in bright rooms, but their anti-glare coating is quite delicate. Your best bet is to stick with just distilled water. Anything harsher, especially cleaners with alcohol, can strip that coating right off, leaving you with permanent cloudy patches.
Touchscreens: Most modern touchscreens have a special oleophobic coating designed to repel the oils from your fingertips. This coating is the screen's first line of defense against smudges, and it absolutely hates alcohol and ammonia. Using the wrong cleaner will wear it down fast, turning your screen into a permanent fingerprint collection.
The golden rule is to be gentle and always respect your screen's specific finish. You're trying to remove the dirt, not the delicate coatings that make the display look great and function correctly. If you're ever unsure, start with the mildest option—distilled water—before trying anything else.
Ultimately, knowing these small differences is what keeps your display in pristine condition for the long haul. A little knowledge prevents a simple cleaning day from becoming a very expensive mistake.
Common Mistakes That Can Permanently Ruin Your Screen
Knowing the right way to clean your laptop screen is half the battle. The other half is knowing what not to do. It’s shocking how many well-intentioned cleaning habits can lead to permanent, expensive damage. The biggest culprits are probably sitting under your kitchen sink right now.
Steer Clear of Harsh Household Cleaners
Reaching for a bottle of Windex, Lysol, or any other ammonia-based glass cleaner is a catastrophe waiting to happen. These powerful chemicals are designed for hard surfaces like glass windows, not the delicate coatings on your laptop screen. They can strip away anti-glare and anti-reflective layers, leaving behind ugly, permanent cloudy patches.
The same warning applies to using straight vinegar or rubbing alcohol. While they're great for other jobs, they are far too aggressive for most modern laptop displays and can cause irreversible damage.
Abrasive Materials Are Your Screen's Worst Enemy
Another huge mistake is grabbing the wrong kind of cloth. It might seem convenient, but a paper towel or a dish rag can act like fine sandpaper on your screen. The wood fibers and trapped grit create micro-scratches that build up over time. In fact, research shows that using paper towels can dull a screen 15% faster over just two years.
Even popular spray-based cleaners, which make up 28.7% of the market, are often misused. This misuse is linked to 22% of all user-reported screen damages each year. The takeaway is simple: the tools and your technique are just as important as the cleaner itself.
The Problem with Pressure and Puddles
Be gentle. Pushing too hard when you wipe can permanently damage the delicate liquid crystals (the "LC" in LCD) underneath the glass. This can lead to dead pixels or discolored blotches that you can't fix.
You also need to avoid spraying any liquid directly onto the screen. It’s just too easy for droplets to seep down behind the bezel and fry the sensitive electronics inside. Always apply the cleaner to your cloth, never to the screen itself.
Keeping your laptop in top shape involves more than just a clean screen. For a full system boost, check out our guide on how to speed up computer performance.
Common Questions About Cleaning Your Laptop Screen
Even when you know the basics, a few specific questions always seem to come up. Let's tackle some of the most common ones I hear, so you can feel confident you're doing it right.
How Often Should I Clean My Laptop Screen?
There's no single magic number here—it really comes down to how you use your laptop and where you use it. For the average person, a quick, gentle cleaning once a week is usually enough to keep dust and smudges at bay. It’s a simple routine that keeps your display clear.
Now, if you’re constantly tapping a touchscreen, or if your laptop lives in a dusty workshop or a home with kids and pets, you'll want to clean it more often. In those cases, bumping it up to two or three times a week makes sense. It’s not just about aesthetics; a grimy screen can actually contribute to eye strain. Of course, finding ways to reduce screen time helps too, since less use means less dirt.
Are Pre-Packaged Screen Wipes Safe To Use?
This is a great question. Those convenient little wipes can be a lifesaver, but you have to be picky. Many are perfectly fine, but the devil is in the details—or in this case, the ingredients.
Before you buy, flip the package over and check the label. The golden rule is to find wipes that are explicitly marked as ammonia-free and alcohol-free. Those chemicals are way too harsh and can slowly eat away at the screen's protective coatings, leading to hazy spots and permanent damage.
Your safest bet is to always stick with wipes made specifically for delicate electronics.
What If I Accidentally Spilled Liquid On My Laptop?
First, don't panic—but do act fast. If any liquid gets near the screen's edge or onto the keyboard, immediate action is crucial. The very first thing to do is power down the laptop completely. Don't just put it to sleep; shut it all the way down and unplug it from the wall.
Carefully tip the laptop to help any liquid drain away from the important bits, using a dry cloth to soak up everything you can see. The next step requires patience: leave the laptop open in a dry, well-ventilated spot for at least 24-48 hours. Whatever you do, don't grab a hairdryer; the intense heat can warp plastic and fry sensitive components. If it was more than a small spill, your best move is to get it to a repair professional who can check for internal damage.
At Simply Tech Today, we believe in making technology simple and accessible. For more straightforward guides and tech tips, visit us at https://www.simplytechtoday.com.
Member discussion