
How to Organize Digital Photos and Reclaim Your Memories

If your digital photo collection looks more like a cluttered attic than a cherished album, you’re in good company. Let’s be honest, that feeling of dread when you think about sorting through thousands of images is real. The good news is that wrangling them into shape isn’t about some magic software—it’s about having a straightforward, repeatable workflow.
It all boils down to this: first, figure out what you’ve got and where it is. Then, get everything into one place. And finally, create a simple folder and naming system that you can actually stick with.
Confronting Your Digital Photo Overload
We’ve all become accidental digital hoarders. With a high-powered camera in every pocket, we capture everything from epic vacation sunsets to blurry pictures of our lunch. It's no wonder our camera rolls are bursting at the seams.
The sheer volume is mind-boggling. Research shows that by 2026, the world will snap nearly 1.98 trillion photos in a single year, with a staggering 94% of those coming from smartphones. That messy camera roll isn't just in your head; the average person is sitting on about 2,700 photos, a jumble of priceless memories, accidental duplicates, and screenshots you don't even remember taking. According to Rise Above Research, this explosion of images makes trying to sort them one by one a losing battle.
This guide lays out a complete workflow for taming your photo collection. Here is a high-level roadmap of the core phases we'll cover.
Your 4-Phase Photo Organization Blueprint
| Phase | Key Action | Why It Matters |
|---|---|---|
| Phase 1: Foundation | Audit your collection, choose your storage hub, and define your folder structure. | Sets the stage for success by creating a clear plan before you move a single file. |
| Phase 2: Consolidation | Centralize all photos into your chosen hub and implement your naming convention. | Brings everything together in one place, ending the chaos of scattered files. |
| Phase 3: Refinement | Use metadata and tags for searchability, then find and delete duplicates. | Makes your library smart and searchable, so you can find what you need instantly. |
| Phase 4: Automation & Maintenance | Set up automatic imports, establish a backup routine, and schedule regular check-ins. | Creates a sustainable system that keeps your library organized for the long haul. |
Think of these phases as a project plan. By tackling them in order, you’ll turn a mountain of a task into a series of manageable steps.
The Mindset Shift: From Overwhelmed to Empowered
Before you touch a single file, the most important step is a mental one. You have to switch from feeling buried by the mess to feeling in control. The goal isn't just a one-time cleanup; it's about building a system that prevents the chaos from coming back.
This means accepting a hard truth: not every photo is a keeper. A smaller, well-curated collection of your best shots is infinitely more valuable than a massive, disorganized archive you can never navigate.
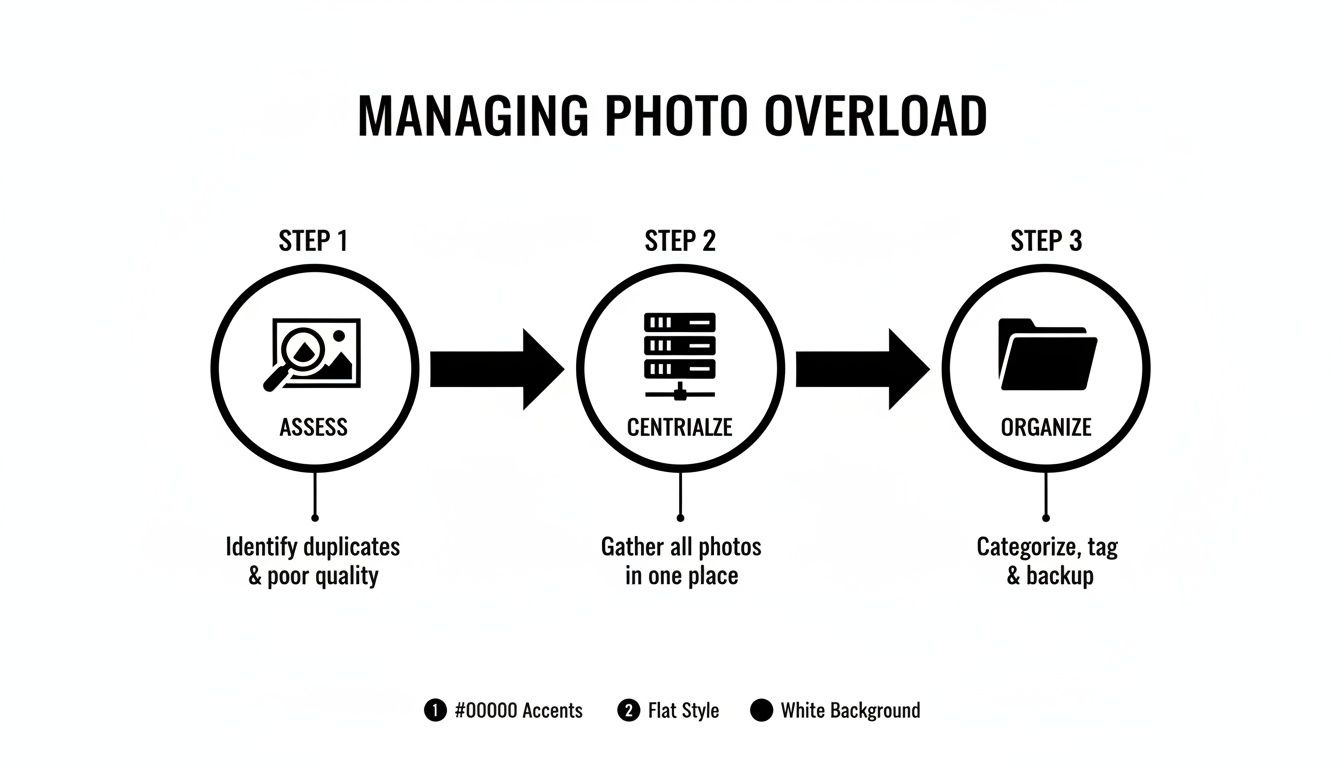
Breaking it down like this—assessing, centralizing, and then organizing—makes the whole project feel less intimidating and much more achievable.
Your Starting Point: The Digital Audit
Okay, time for action. The very first thing to do is a "digital audit." Think of it as taking inventory of every photo you own, wherever it might be hiding. Don't start moving or deleting anything yet. Just make a list.
- Round up your devices: Jot down every phone, tablet, and computer (current and old) that might have photos on it.
- Find all external storage: Pull out those external hard drives, USB sticks, and random SD cards from the back of your desk drawer.
- Check your cloud accounts: List services like iCloud, Google Photos, Dropbox, or even that old Flickr account you forgot about.
- Don't forget social media: Remember that platforms like Facebook and Instagram are holding on to copies of your pictures, too.
The point of this audit isn’t to get organized. It’s to understand the true scope of your collection. You can't build a tidy home for your photos until you know exactly what you're working with.
This is also a great time to see which devices are gasping for air. If you're constantly getting "storage full" warnings, it’s worth learning some quick tricks on how to free up storage space before you start moving thousands of photos around.
Once you have a complete map of your digital photo world, you're ready for the next big decision: choosing the central hub where everything will finally live together.
Choosing Your Central Photo Hub
Before you can start organizing, you need a home base for your photos—a single, reliable place where every picture you take will live. This is the bedrock of your whole system, and the choice you make here will define how you access, share, and protect your memories for years.
There’s no single "best" answer. The right fit really comes down to your needs, your budget, and how you actually use your photos day-to-day. Let's walk through the three main approaches to figure out what makes the most sense for you.
The Local Storage Strategy
Going local means keeping your photo library on physical hardware you own and control. Think external hard drives or, for a more advanced setup, a Network Attached Storage (NAS) device. A NAS is basically a mini-server for your house, giving you your own private cloud.
The huge upside here is complete control and privacy. Your files aren't sitting on someone else's server, and you aren’t paying a monthly subscription. For photographers or anyone shooting massive RAW files, the speed of pulling images directly from a local drive is unbeatable.
- Who it’s for: Pro photographers, videographers, and anyone who puts speed, control, and privacy above all else. It's also a great fit if you have a massive library and want to dodge recurring cloud fees.
- The tradeoff: You are 100% responsible for your own backups. If your hard drive dies and you don't have a second copy, those photos are just gone. You also miss out on the automatic syncing and easy sharing that make cloud services so popular.
The Cloud Storage Advantage
There's a reason services like Google Photos, Apple iCloud, and Dropbox have taken over. They offer incredible convenience, automatically pulling photos from your phone and syncing them to a secure online server. Your entire library becomes accessible from anywhere, on any device you own.
For a busy family, this is a lifesaver. You could be at a kid's soccer game, and the photos you snap are instantly available for your partner to see on their tablet at home. Sharing a whole album with the grandparents is as easy as sending a link.
A lot of cloud services now use powerful AI to make your photos searchable. You can type in "beach" or "Aunt Carol" and instantly find what you're looking for, even if you don't remember the date or the folder it's in.
The main drawbacks are cost and privacy. The free plans fill up fast, and as your collection grows, you'll almost certainly need to pay a monthly or annual fee. You're also trusting a company with your personal memories, which is a valid concern for many. To get a better handle on how these platforms work, you can learn more about how to use cloud storage effectively in our detailed guide.
The Hybrid Model: The Best of Both Worlds
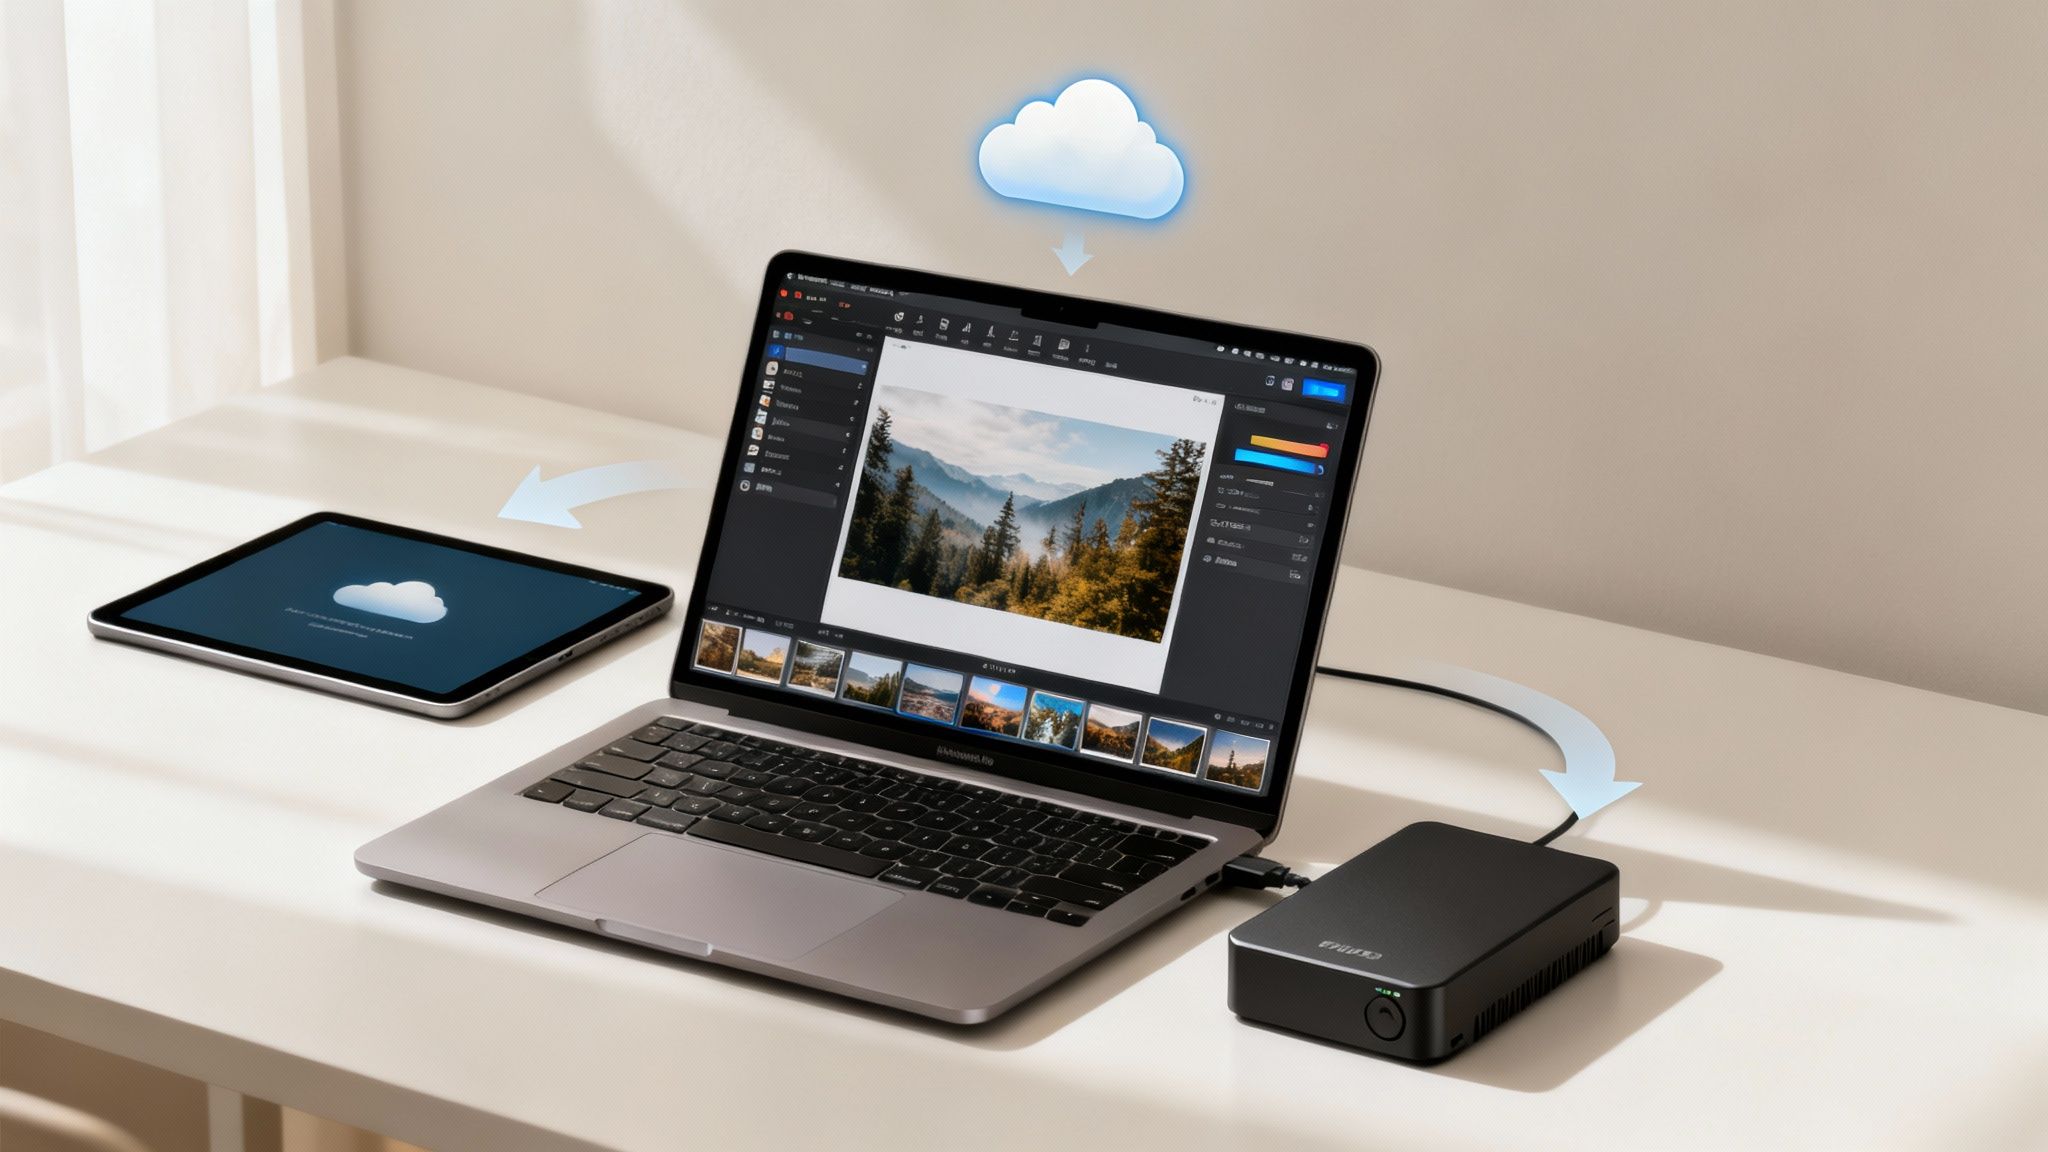
Honestly, why choose? A hybrid approach combines the security and speed of local storage with the convenience and access of the cloud. I personally believe this is the most robust and secure way to manage a photo collection you truly care about.
Here’s how it works: your original, full-resolution photos live on a local drive or NAS. That’s your master archive. From there, you sync a copy of your library (or maybe just your favorite shots) to a cloud service. This gives you easy access and a fantastic off-site backup.
| Feature | Local Storage | Cloud Storage | Hybrid Model |
|---|---|---|---|
| Primary Benefit | Speed & Control | Convenience & Access | Security & Flexibility |
| Recurring Cost | None (after hardware) | Yes (for more space) | Yes (for cloud portion) |
| Backup Responsibility | 100% on you | Managed by the service | Shared responsibility |
| Best For | Professionals, large files | Families, casual users | Everyone who wants peace of mind |
For instance, a travel blogger I know keeps terabytes of RAW photos on her home NAS for fast editing. But she uses Google Photos to share curated albums from her trips with friends and family. This gives her the best of both worlds. Plus, it automatically protects her life's work from a local disaster like a fire, flood, or theft.
Picking your central hub is the most critical decision you’ll make in this entire process. Think hard about your priorities: is it raw speed, everyday convenience, or bulletproof security? Your answer will point you straight to the system that will serve you best.
Building a Future-Proof Folder Structure
Once you’ve decided where your photos will live, the next job is to give them a sensible home. Think of it as designing a digital filing cabinet. A logical folder structure is probably the single most important thing you can do to create a photo library you can actually navigate years from now. Without it, you’re just creating organized chaos.
The goal is to build a system that's simple, repeatable, and doesn't rely on any specific software. That way, if you ever decide to ditch Google Photos for a local hard drive, your entire organizational system comes with you, perfectly intact. After years of trying different methods, I've found the most effective and universally understood approach is a simple chronological one.

The Chronological Framework Explained
Let's get one thing straight: vague folder names like "Summer Vacation" or "Family Stuff" have to go. They seem helpful in the moment, but they become totally useless over time. Was that "Summer Vacation" from 2019 or 2022? Which "Family Stuff" folder has the photos from Grandma’s 80th birthday?
A time-based system gets rid of all that guesswork. Here’s a simple but incredibly powerful structure that works for everything, from a few hundred phone snaps to a massive archive of professional shoots.
- Top Level: Year. Start by creating a main folder for each year (e.g.,
2023,2024,2025). This immediately breaks your entire collection into manageable chunks. - Second Level: Month. Inside each year folder, create twelve subfolders for the months. I always name them numerically so they sort correctly:
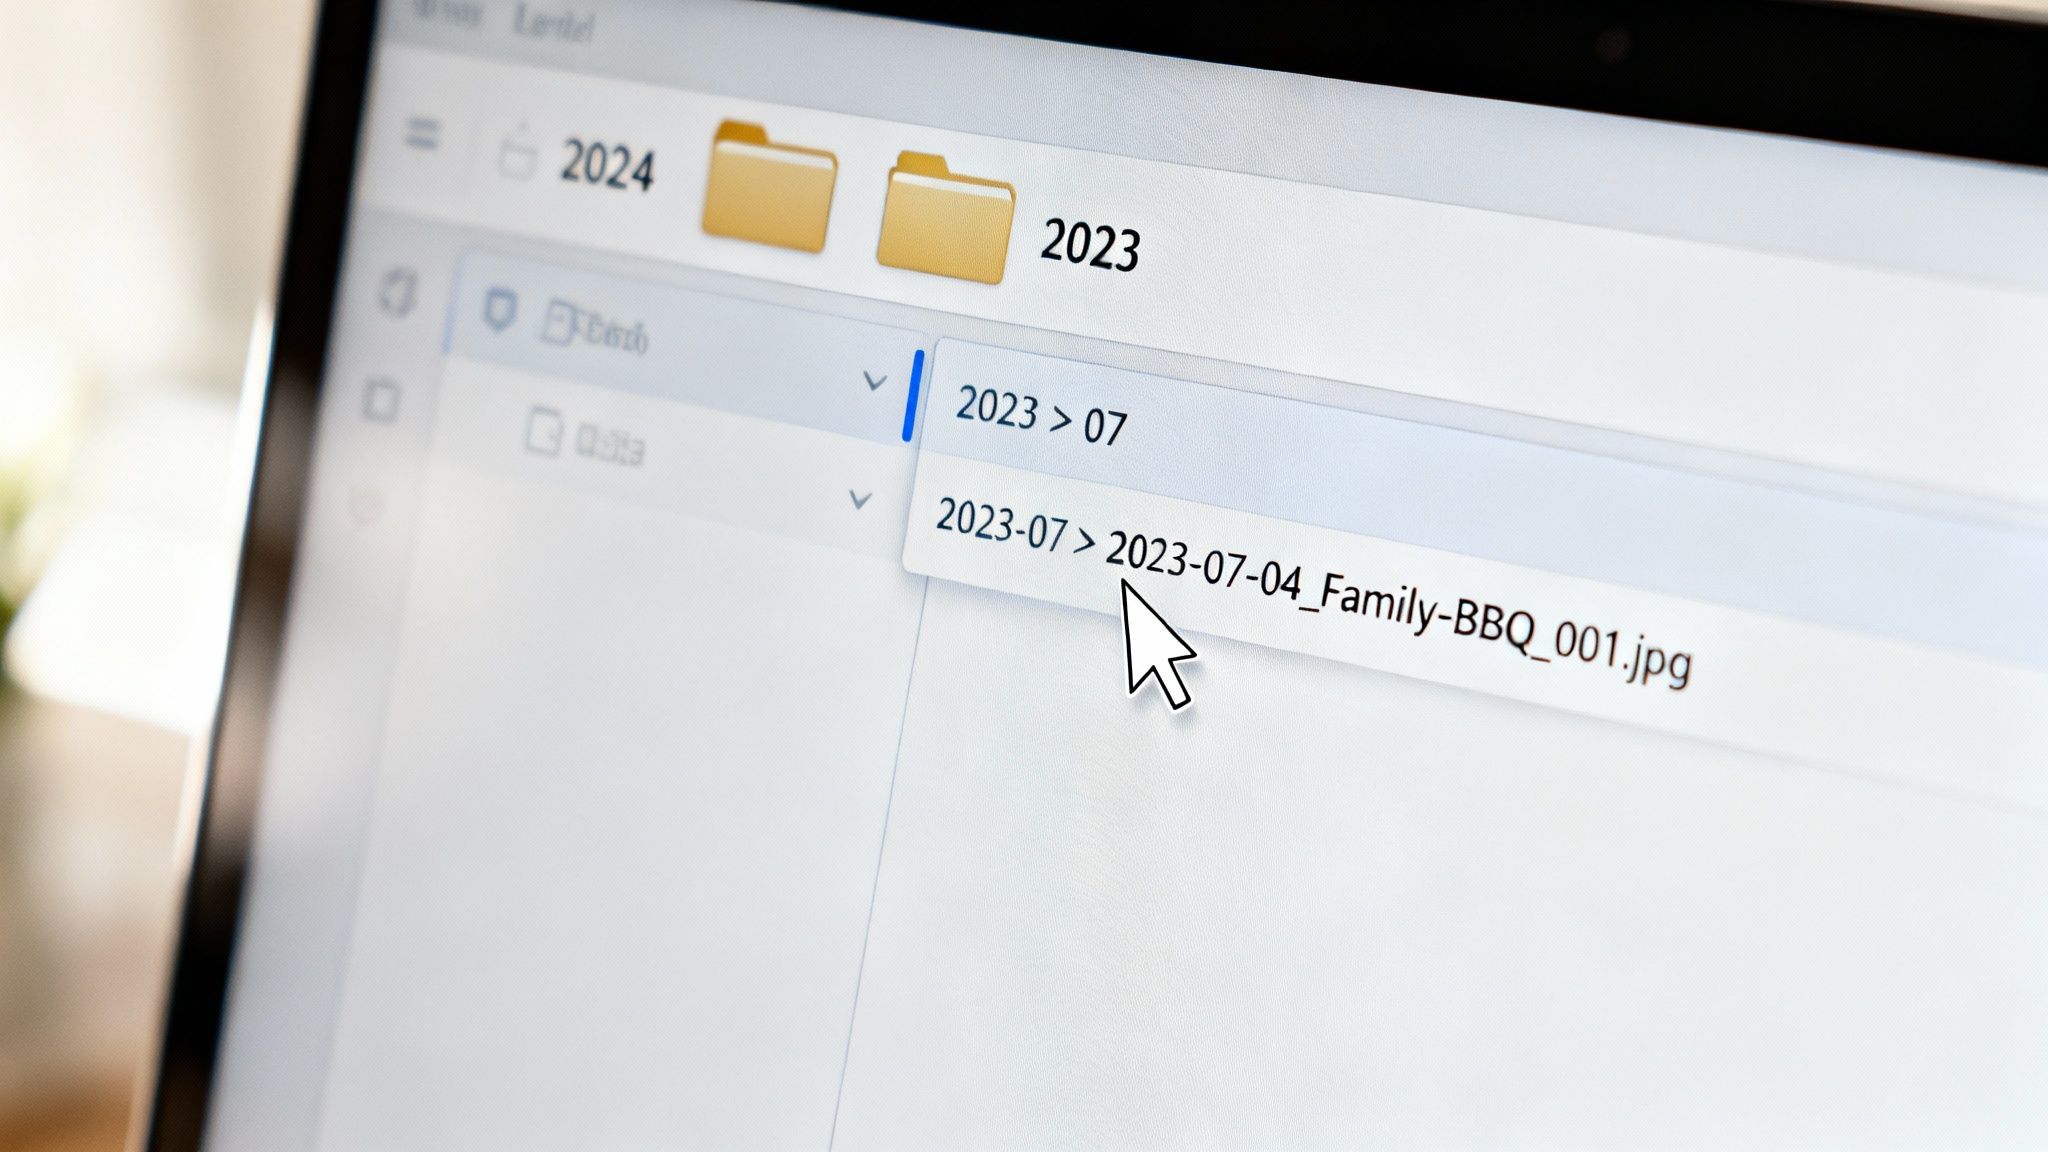
01_January,02_February, and so on. - Third Level: Event. This is where the real magic happens. Inside each month, create folders for specific events using the
YYYY-MM-DD_Event-Nameformat. A perfect example is2023-07-04_Family-BBQ.
This three-tiered approach strikes the perfect balance. It gives you enough detail to find things quickly without becoming overly complicated. You can drill down to the exact moment you're looking for in just a few clicks.
Forcing yourself to use a date-first naming convention for event folders ensures they automatically sort chronologically. This small discipline pays off in a huge way, making your library predictable and a breeze to browse.
Adapting the System for Real-World Scenarios
The beauty of this structure is its flexibility. It can handle just about any situation you throw at it.
For instance:
- Daily Smartphone Photos: Don't have a specific "event"? No big deal. Just create a folder like
2024-05-15_Random-Snapsfor miscellaneous photos from that day. - Decades of Scanned Photos: If you're digitizing old family prints and have no idea of the exact date, just make your best guess. A folder named
1985-06-00_Childhood-Homeis a hundred times more useful than a generic "Old Photos" folder. The00tells you the day is unknown but still places it correctly in the timeline. - Multi-Day Trips: For a week-long vacation, I use a date range, like this:
2023-08-10_to_2023-08-17_Italy-Trip. This keeps all the related photos neatly bundled together inside the August folder.
Creating a Consistent File Naming Convention
A great folder structure is only half the battle. To build a truly searchable system, your individual file names need to be just as logical. The default names from your camera—like IMG_5821.jpg—are completely meaningless.
The best practice is to have your file names mirror your event folder, creating a powerful one-two punch for organization. The goal is to rename files to include the date, a quick description, and a sequence number.
The Format I Swear By: YYYY-MM-DD_Event-Name_XXX.jpg
Let's break down why this works so well:
| Component | Example | Purpose |
|---|---|---|
| Date (YYYY-MM-DD) | 2023-07-04 |
Provides instant chronological context. |
| Event Name | Family-BBQ |
Describes what's actually in the photo. |
| Sequence Number (XXX) | 001, 002 |
Keeps photos from the same event in the right order. |
A file named 2023-07-04_Family-BBQ_001.jpg tells you everything you need to know without you even having to open it. Even if that file somehow gets separated from its folder, its name alone tells you its exact place in your life's timeline.
How to Batch Rename Your Files
The thought of renaming thousands of files by hand is enough to make anyone give up. Don't worry, you don't have to. Most operating systems and photo tools have built-in batch renaming features that can do all the heavy lifting for you.
- On Windows: In File Explorer, just select a group of files, right-click, choose "Rename," and type your new name. Windows automatically adds a sequence number.
- On macOS: In Finder, select your files, right-click, and choose "Rename." The interface here is surprisingly powerful, letting you add text, format dates, and create custom naming sequences.
- Dedicated Software: For more control, tools like Adobe Bridge, Adobe Lightroom, or free alternatives like Bulk Rename Utility offer advanced options for creating complex file names across thousands of images in just a few clicks.
By investing a little time upfront to establish this folder and file naming discipline, you're not just cleaning up a mess. You're building a future-proof, searchable, and deeply personal archive that will stay organized for decades.
Supercharge Your Search with Metadata and AI
A solid folder structure is your foundation, but what about finding a specific photo inside those folders? This is where the real magic happens. Your photos are smarter than you think, and tapping into their hidden data turns your library from a simple collection of files into a deeply searchable archive of your life.
Every picture you take has a secret layer of information baked right in. This is called EXIF metadata, and it's automatically embedded by your camera or phone. It’s the invisible ink that photo management software uses to work its wonders.
Ever wonder how Google Photos or Apple Photos can pull up a "Memory" from this day five years ago? They're not guessing. They're simply reading the EXIF data that's been there all along.
What Your Photos Already Know About Themselves
So, what kind of intel are we talking about? The most useful bits of EXIF data include:
- Date and Time Taken: The exact moment you clicked the shutter.
- Geolocation: GPS coordinates showing precisely where the photo was snapped (if you have location services enabled).
- Camera Settings: Nerdy details like the camera model, lens, aperture, and shutter speed.
This is the stuff that lets software automatically sort your photos on a timeline or plot them on a map—no manual labor required. It's an incredibly powerful first layer of organization that works for you in the background.
Let AI Do the Heavy Lifting
Modern photo apps have taken this a huge step further. They now use artificial intelligence to actually see what's inside your pictures. This is a complete game-changer, allowing you to search for concepts, objects, and even specific people without having to manually label a single thing.
Think about it. You can just type "dog at the beach" into your photo app and instantly see every shot of your pup enjoying the sand and surf. The AI scans your library, understands the context, and pulls up the relevant images in seconds. To get a better sense of the technology behind this, you can learn more about how to use AI tools and how they interpret information.
This isn't just a cool party trick; it's a fundamental shift in how we find our memories. You no longer have to remember where you filed a photo—you just have to remember what was in it.
This ability transforms your photo library. It's no longer just a digital shoebox; it's a smart assistant that can help you rediscover moments you might have completely forgotten.
Get Personal with Manual Tags
As smart as AI is, it can't read your mind. It might see a "wedding," but it doesn't know it was your "Cousin Sarah's Wedding." That's where a little bit of manual effort with keywords, or tags, can make a world of difference.
Tagging is just adding your own descriptive words to photos so you can find them later. You don't need a complex system; just be consistent.
Here’s a simple set of tags to get you started:
- People: Tag photos with the names of family and friends (
Aunt Carol,Mike Miller). - Places: Go beyond the GPS and add specific landmark or venue names (
Eiffel Tower,Fenway Park). - Events: Use the same name for recurring events (
Christmas 2023,Annual Camping Trip). - Themes: Add broad categories that matter to you (
Hiking,Road Trip,Home Improvement).
This kind of metadata is now almost universal. Since the 2010s, an estimated 90% of smartphone photos have included date and location data, making automatic sorting incredibly easy. Features like smart albums that filter by people are expected to reach 95% accuracy, letting you instantly group every photo of your kids from that 2015 family reunion.
The absolute key is consistency. Always use "Birthday" instead of sometimes using "Bday" or "Birthday Party." Most software, like Adobe Lightroom or Apple Photos, helps by suggesting tags you've used before. Adding just a few relevant keywords to a group of photos can make your entire library searchable with laser precision.
Culling Duplicates and Streamlining Edits
With a solid structure in place, it’s time to curate. I’ve found that a truly great photo library isn't just about what you keep; it's defined by what you’re willing to get rid of. This is where you transform a bloated digital junk drawer into a polished, enjoyable collection by ruthlessly cutting out the clutter.
Think about it. For every perfect shot of your kid's first day of school, you probably have nine near-identical ones where someone blinked or the focus is just a little soft. Keeping all ten just creates a headache later. The goal is to make a decisive choice now, keeping only the single best image that perfectly captures the memory.
The Art of the Quick Cull
Your first pass at culling should be fast and almost instinctual. Don't get bogged down in the details. The idea is to quickly ditch the obvious rejects so you can spend your time on the photos that actually matter.
As you go through each event folder, your mission is to delete anything that is:
- Technically flawed: This is the low-hanging fruit—blurry, out-of-focus, or horribly exposed photos. If it's way too dark or completely blown out, it's gone.
- Clearly a mistake: We all have them. The accidental shot of the pavement, the inside of a pocket, or a bunch of half-closed eyes. No mercy here.
- Redundant: Get rid of those near-identical burst shots. Pick the one sharpest image with the best expression and delete the rest. You won't miss them.
- Useless screenshots: That screenshot of a recipe you never made or a map from three years ago is just digital noise. Unless it has real sentimental value, it’s time for it to go.
This cleanup phase is surprisingly satisfying. You’ll be shocked at how much digital weight you can shed, making your entire library feel lighter and so much easier to navigate.
Finding and Eliminating Duplicates with Software
Beyond the blurry shots and accidental clicks, your collection is almost certainly filled with true duplicates—exact copies of the same file scattered across different folders and drives. This happens all the time when you import photos from the same phone or camera more than once.
Hunting these down manually is a fool's errand. This is where dedicated duplicate-finder software becomes your best friend.
Using a specialized tool to find duplicate photos can reclaim a significant amount of storage space—often 10-20% of your library's total size—and drastically reduce the clutter you have to manage.
Tools like Gemini 2 (for Mac) or Duplicate Cleaner Pro (for Windows) can scan your entire library, sometimes even using visual analysis to find similar (not just identical) photos. They present you with the copies, letting you review and delete them in bulk. Trust me, this automated approach will save you dozens of hours of tedious work.
The Power of Batch Editing
Once your collection is lean and free of duplicates, you can focus on making your keepers look their best. Instead of painstakingly adjusting photos one by one, you can use batch editing to apply the same corrections to a whole group of pictures at once.
This is a game-changer for photos taken during the same event under similar lighting. For instance, if all the photos from an indoor birthday party look a bit too yellow, you can select them all and fix the white balance simultaneously. This simple action creates a much more consistent, professional look across the entire album. Many of the best photo editing apps for beginners offer powerful but easy-to-use batch processing features.
Here are a few adjustments that are perfect for batch editing:
- Exposure and Brightness: Fixing a set of photos that are all consistently too dark or too light.
- Color Correction: Removing an unnatural color cast, like that orange tint from old indoor lighting.
- Applying a Preset: Giving a whole series of photos a consistent stylistic look with a single click.
By culling, deleting duplicates, and batch editing, you’re performing the final, crucial steps that refine your photo library. This is what elevates it from a messy digital archive to a curated gallery of your most cherished memories.
Creating a Bulletproof Backup Routine
All that hard work organizing your photos means nothing if they disappear. A crashed hard drive, a stolen phone, or even an accidental deletion can wipe out years of memories in a blink. If you want to protect your photos, you need a real plan.
This isn’t about being paranoid; it’s just about being smart. The gold standard for keeping data safe is a strategy called the 3-2-1 backup rule. It might sound a bit technical, but it's actually a super simple framework that can help your photos survive just about any disaster you can throw at them.
The 3-2-1 rule is your ultimate safety net. It means having three total copies of your photos, using two different types of storage media, and keeping at least one of those copies off-site.
Following this simple principle is what separates a photo library that's one accident away from disaster from one that's truly secure.
Putting the 3-2-1 Rule into Action
So, what does this look like in the real world? You don't need a server in your closet to make this happen. A couple of common storage tools are all it takes.
Here’s a practical way to set up your own 3-2-1 system:
- Copy 1 (Your Primary Library): This is your main collection, the one living on your computer’s internal drive or maybe a NAS. It's the library you're actively curating and working from.
- Copy 2 (Local, Different Media): Think of this as your first line of defense. An external hard drive is perfect for this. This copy protects you against the most common point of failure—your main computer's hard drive giving up the ghost.
- Copy 3 (Off-Site): Your third copy needs to live somewhere else entirely. This is what protects you from a house fire, a flood, or theft. An automated cloud backup service like Backblaze or iDrive is a fantastic, set-it-and-forget-it option for this.
This mix of local and off-site backups gives you layers of protection. If one copy fails or is destroyed, you always have two others ready to go. To help you choose the right gear, we've put together a guide on the best external hard drives for backup that covers reliable options for that all-important second copy.
Your Simple Maintenance Checklist
A backup system is only good if you actually use it. To make sure this doesn't become another chore you put off, just build a simple quarterly habit. Pop a recurring reminder in your calendar for the first weekend of every quarter to run through these three quick steps.
- Import and Organize: Pull in all the new photos from your phone, cameras, and anywhere else they've collected. Get them sorted into your main library using the folder structure you've already set up.
- Run Your Local Backup: Plug in your external hard drive and let your backup software do its thing. This syncs up your second copy with all the latest shots.
- Verify Your Cloud Backup: Log into your cloud backup account and just double-check that everything is running smoothly. A quick look to see that your most recent folders have been uploaded is all you need for some serious peace of mind.
This repeatable checklist barely takes any time, but the security it provides is massive. By committing to this simple routine, you're making sure your carefully organized collection will be safe for years to come.
Your Digital Photo Organization Questions Answered
Even with the best workflow, a few tricky questions always pop up. Let’s clear up some of the most common hurdles people face when they start organizing their photos.
What Is the Best Software for Organizing Photos?
There's no single "best" choice here—it really comes down to what you need.
For most people, the built-in options like Google Photos and Apple Photos are more than enough. They’re fantastic for simple, automated organization and their search capabilities are incredibly powerful.
If you’re a serious hobbyist or professional who needs granular control over metadata and powerful editing tools, then Adobe Lightroom is the undisputed industry standard. But if you just want to manage files directly on your computer without a big cloud subscription, something like Adobe Bridge (free) or an open-source tool like digiKam works wonders.
My advice? Start with what’s already on your phone or computer. Only look for a new tool when you run into a specific problem you can't solve.
How Should I Handle Old Physical Photos?
The only answer is to digitize them! Getting those old prints and slides into your digital library is a game-changer.
You can invest in a dedicated photo scanner for the best quality, but honestly, your smartphone can do a surprisingly good job. Apps like Google's PhotoScan are designed to minimize glare and automatically crop the edges for you.
Once you've scanned a photo, treat it just like any other digital file. Give it a file name with your best guess at the date, like
1985-06-00_Family-Vacation_001.jpg, add tags for who's in it, and drop it right into your main folder structure.
Doing this brings your entire life's photo history into one single, searchable library. Suddenly, those shoebox memories are just as easy to find as the pictures you took last week.
At Simply Tech Today, we believe managing your digital life shouldn't feel like a chore. If you're looking for more guides that turn complex tech into simple, practical advice, check out our other articles at https://www.simplytechtoday.com.
Member discussion