
How to Use Google Photos: Your Ultimate 2026 Guide

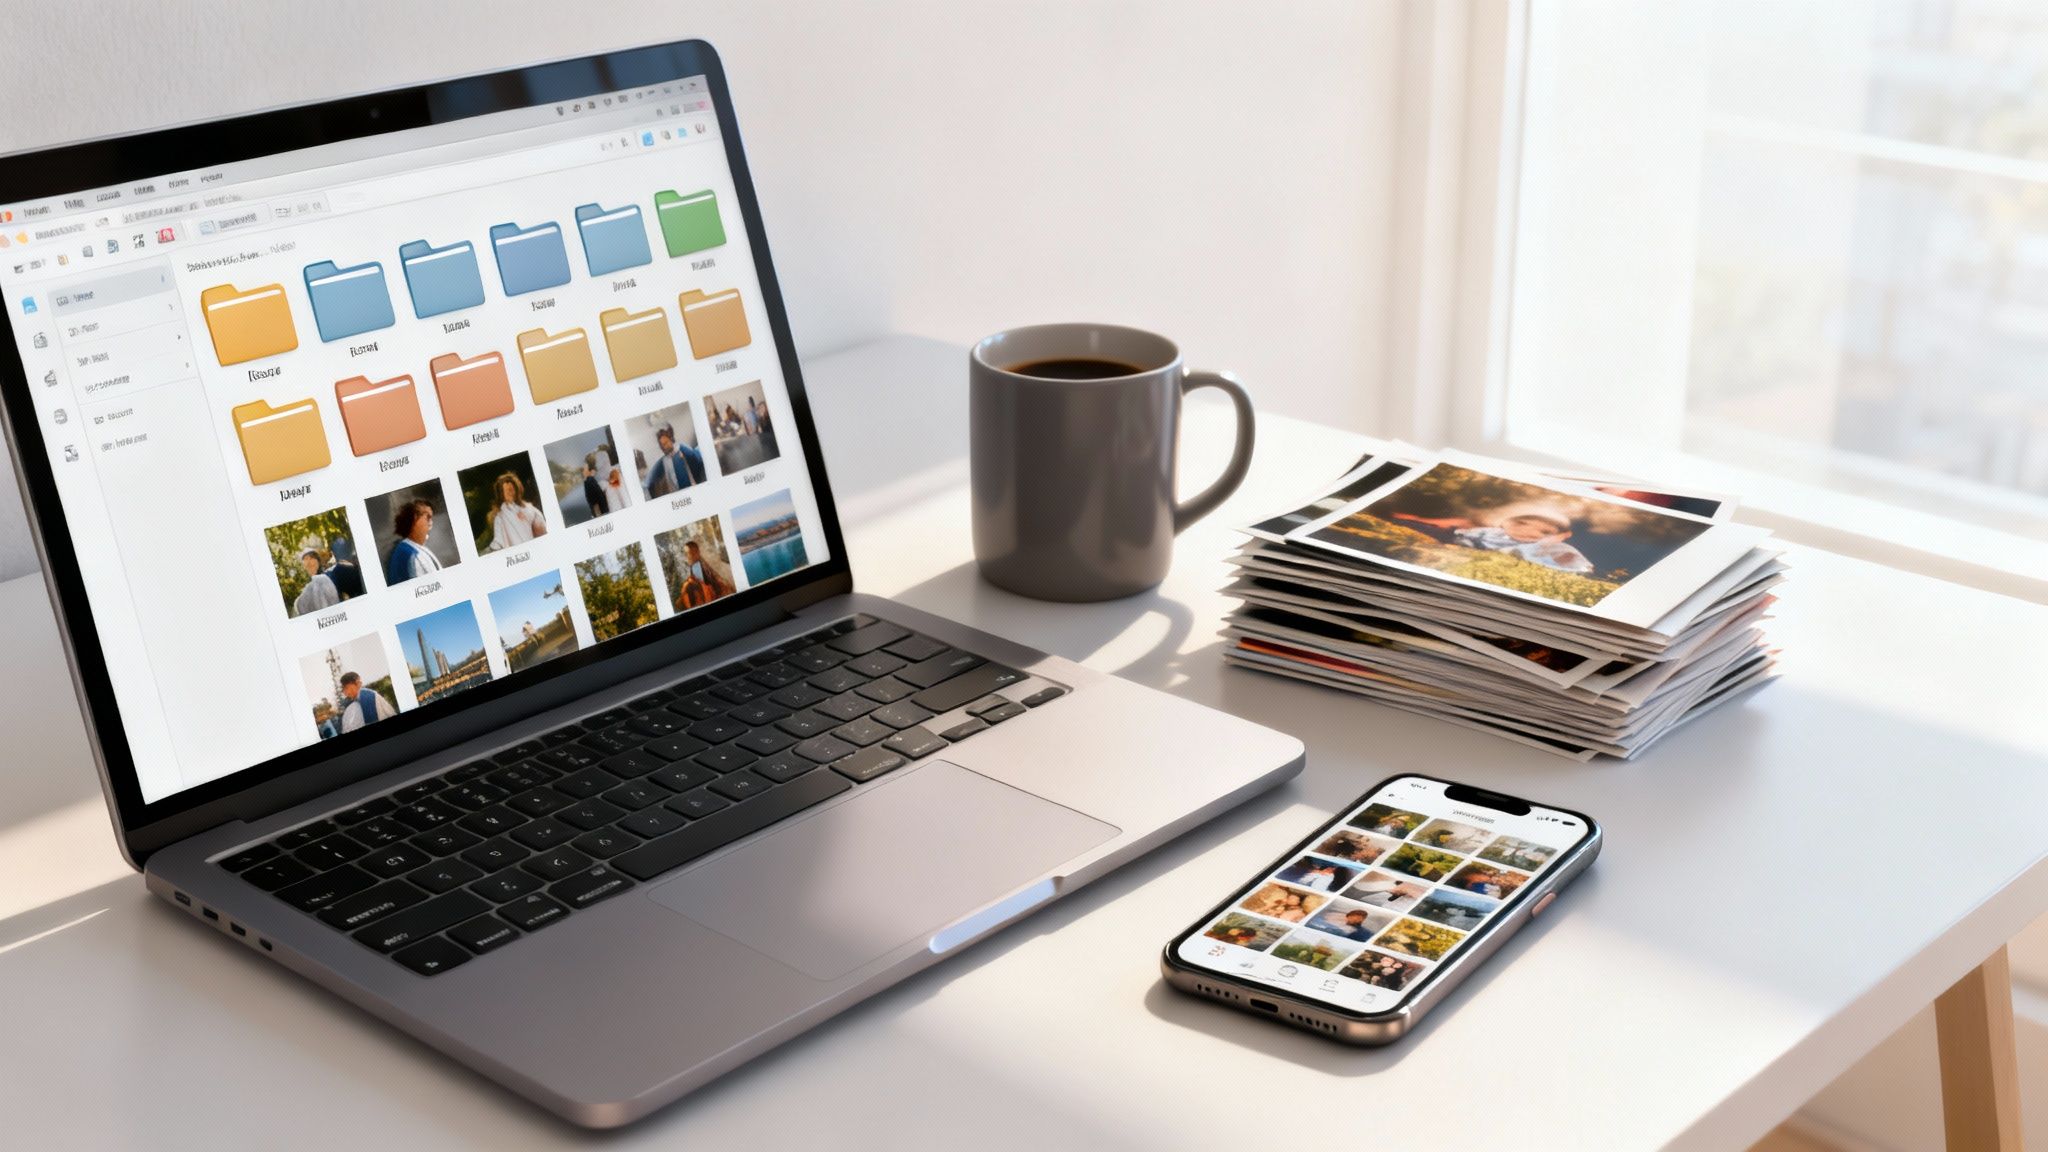
Your phone is full. Your camera roll is messy. Half your favorite pictures are buried under screenshots, memes, and duplicate pet photos. On top of that, you may also have a box of old printed photos in a closet that never made it into your digital life.
That’s where Google Photos can feel less like a gallery app and more like a memory control center. If you learn a few core habits, it can back up your pictures, help you search them in plain English, clean up distracting objects, and make old scanned photos easier to find later.
A lot of guides stop at the basics. This one doesn’t. If you’ve been wondering how to use google photos without feeling like the app is making decisions for you, this walkthrough keeps the useful parts simple and gives extra attention to two areas people often struggle with: old physical photos and privacy around AI features.
Getting Started with Google Photos Setup and Backup
The most important Google Photos choice happens early. It’s your backup setup.
If backup isn’t turned on correctly, everything else feels shaky. Search won’t feel complete, sharing gets inconsistent, and editing tools may not work the way you expect.

Choose your backup quality first
When you first open Google Photos and sign in, the app asks how you want your photos backed up. This is worth slowing down for.
Users typically see options like Storage saver and Original quality. The practical difference is simple:
- Storage saver works well if you want easy cloud backup and don’t obsess over keeping every file exactly as shot.
- Original quality makes more sense if you care about preserving the original file as closely as possible, especially for important family photos, scans, or images you may want to print later.
If you’re using a brand-new phone, setup is usually quick. Google Photos starts watching your camera folder, and new pictures begin backing up automatically once you allow it.
If you’re moving from an old phone with years of photos, the first sync can take a while. That’s normal. The app may need time to scan your library, identify folders, and upload everything in the background.
Practical rule: Don’t judge Google Photos in the first few minutes after setup. Large libraries often look incomplete until the first backup finishes.
What setup looks like on a new phone
On a new device, keep it simple:
- Install or open Google Photos.
- Sign in with the Google account you want to keep long term.
- Allow photo and video access.
- Turn on backup.
- Leave the app open for a bit on Wi-Fi if you want the first wave of photos to upload faster.
Check the profile picture in the app. Tap it and look for the backup status. If it says it’s backing up, you’re on track.
This is also a good time to decide whether you want Google Photos backing up only camera images or additional folders too, such as screenshots, WhatsApp images, or downloaded pictures. Many people get overwhelmed later because they backed up everything without thinking about it.
What setup looks like on an older phone
An older phone is where confusion usually starts.
You may open Google Photos and see thousands of pictures already sitting on the device. The app still needs to compare those files against your cloud library. During that first pass, some albums may look mixed together or slow to populate.
A good approach is to be patient and check a few things:
- Use the right account: Make sure you didn’t sign into a spare school or work Gmail by accident.
- Keep the phone charging: Long backup sessions go more smoothly when the battery isn’t dropping.
- Use stable Wi-Fi: Large uploads often stall on weak mobile data.
- Leave background activity enabled: If your phone restricts background data or battery use, backup may pause.
If your phone has years of old folders, don’t expect Google Photos to mirror your file structure exactly. It’s designed more around a searchable photo library than a traditional folder tree.
Old printed photos belong in your setup plan too
A lot of people treat old prints as a separate project. It’s better to think of them as part of the same library from day one.
If you’re starting to scan childhood albums, vacation prints, or family portraits, it helps to follow a clean process before dumping them into Google Photos. A practical primer on how to digitize photos can help you avoid crooked scans, glare, and poor file naming.
Once you’ve got scans ready, upload them into the same Google account you use for your everyday photos. That way, your digital life and your family archive don’t live in separate silos.
A few setup mistakes to avoid
Here’s where people trip up most often:
| Situation | What goes wrong | Better move |
|---|---|---|
| Using the wrong Google account | Photos end up split across accounts | Confirm your profile photo and email before backup starts |
| Turning on every folder | Screenshots and junk flood your library | Start with camera photos, then add folders intentionally |
| Closing the app too soon | Initial sync looks broken | Give the first backup time to finish |
| Ignoring general phone backup habits | Photos may be backed up, but other important data isn’t | Review a broader phone backup checklist at https://www.simplytechtoday.com/how-to-backup-phone-data/ |
Backup is the foundation. If that part is messy, every later feature feels harder than it should.
Finding and Organizing Your Memories with AI
You’re trying to find one photo. Maybe it’s your dad holding a birthday cake in the late 1990s, or the picture of your dog on that windy beach trip. You do not remember the year, the folder, or the file name. This is the moment Google Photos starts to feel less like a storage bin and more like a searchable memory library.

Search the way you remember things
People rarely remember names like IMG_4821. They remember scenes, faces, places, and little details.
That is how Google Photos search is designed to work. Start with the obvious thing you recall, then add one more clue if needed.
Useful searches include:
- Dog beach
- Birthday cake
- Mountain hike
- Screenshots
- John and Sarah
This works especially well when your library includes both recent phone photos and older scanned prints. A scanned photo of “grandma at Christmas” should be findable the same way as a photo you took last week. That unified library is one of the biggest advantages of bringing old physical photos into Google Photos instead of leaving them in separate folders on a computer.
Google Photos also creates helpful groupings such as selfies, screenshots, and other visual categories. Those groupings are useful for browsing, but they are not a full organization system by themselves.
Albums still have a job. Search helps you retrieve photos. Albums help you shape a story on purpose. Collections like “College memories,” “First apartment,” or “Best family scans” are easier to revisit later, especially if you want a cleaner long-term system for organizing a growing digital photo library.com/how-to-organize-digital-photos/).com/how-to-organize-digital-photos/).
Ask Photos depends on good date and context clues
AI features are only as helpful as the information attached to your pictures.
Google notes that Ask Photos works best with backed-up images and accurate metadata, including date information and other details that help the app understand what you’re searching for. That matters a lot with scanned prints, because the scan date is often wrong for the memory itself. A photo taken in 1998 but scanned this week can end up looking “new” unless you correct it.
That one mistake creates confusion fast. Searches like “first photo of my pet” or timeline browsing by decade can feel unreliable, even when the image is in your library.
If you are adding a large family archive, treat metadata like labels on storage boxes in an attic. The photos are still there without labels, but finding the right one takes much longer.
Bring old physical photos into the same searchable library
Old printed photos deserve the same care as your phone pictures. If you handle them well, they become part of the same timeline, same search tool, and same album system.
Use this workflow:
Scan your prints clearly
The Google PhotoScan app is a good starting point if you want cleaner scans with less glare.Upload the scans to Google Photos
If they stay only in a desktop folder, Google Photos cannot help you search them.Correct the date
This is the step people skip most often. If the year is wrong, search and timeline views become much less useful.Add names, albums, or location clues where they help
An album like “Family photos 1990s” gives your archive structure while Google Photos continues sorting and recognizing details.Test a real search
Try phrases you would use later, such as “first apartment,” “dad as a child,” or “old dog photos.”
Poor date information does not just make a library look messy. It changes how well AI can find your memories.
Use a light system you can keep up with
You do not need perfect organization. You need a system that still makes sense six months from now.
A good approach is to let Google Photos handle broad discovery while you step in for the memories that need context. Use albums for life events, favorite the photos you return to often, and fix older scans in batches instead of trying to repair everything in one sitting.
A simple rhythm works well:
Use albums for major events and eras
Trips, graduations, birthdays, home projects, and school years are good candidates.Let search handle everyday moments
You probably do not need an album for every lunch, sunset, or random Tuesday.Correct old scans a little at a time
Work through childhood, teenage years, or early family vacations one group at a time.Use favorites as your shortcut collection
This becomes a quick personal highlight reel.
When search results feel off
If Google Photos seems bad at finding something, pause before blaming the AI.
Check the basics first. Was the photo backed up? Is the date accurate? Was it scanned recently but never assigned the original year? Are you starting with a very narrow search phrase?
Begin broad, then narrow the search. “Dog” can work better than “brown dog at cabin in October” as a first try.
One more thing matters here: privacy. AI search is convenient because Google Photos analyzes what is in your images and connects that with dates, locations, and other clues. That can be helpful, but it also means photo organization is not only about neatness. It is also about deciding how much of your memory archive you want analyzed, identified, and kept in one place. That question becomes even more important when your library includes old family photos, children, and decades of personal history.
Editing and Enhancing Your Photos Like a Pro
Editing is the point where Google Photos starts to feel less like a storage locker and more like a working photo desk. You are not just keeping memories. You are cleaning them up, rescuing older scans, and deciding how polished you want your archive to be.
That matters for both new phone photos and older family prints you digitized. A quick crop can fix a birthday photo from last weekend. A careful light adjustment can make a faded scanned print easier to share with relatives without changing the character of the original.

Start with the fixes that change the photo the least
A good editing habit is to begin with corrections that improve clarity without changing the memory itself. In other words, fix the frame before you fix the scene.
Start here:
- Crop distractions out: A tighter frame often improves a photo more than any filter.
- Straighten horizons: Beach, lake, road trip, and skyline shots usually look better right away.
- Adjust brightness carefully: Brighten dark images enough to reveal faces, but stop before skin tones look faded.
- Use portrait sliders gently: Overediting can make people look waxy or artificial.
These edits are low risk, easy to undo, and especially useful for scanned photos that need a little cleanup after digitizing.
Use Magic Eraser for small distractions, not major repairs
Magic Eraser helps remove objects that pull your eye away from the main subject. It works best when the unwanted item is small and the surrounding background is easy for Google Photos to rebuild. As noted earlier, the feature requires the photo to be backed up first and tends to work better on simple scenes than busy ones.
Good candidates include:
- a stranger in the background of a vacation shot
- a trash can near a scenic overlook
- a signpost or pole near the edge of the frame
- a photobomber in an otherwise nice family picture
Be cautious with anything near faces, hands, patterned clothes, or old printed photos that already have grain or damage. AI cleanup can leave strange textures behind.
One useful habit is to zoom in before you save. A result can look fine full screen and still have blurry edges or repeating patterns when you inspect it closely.
Use AI edits to restore a photo, not rewrite it
Google Photos offers more AI-based tools than basic cropping and color correction, and that can be helpful. It can also blur the line between editing and altering.
A practical rule is to treat AI tools like dusting off a picture frame, not repainting the painting. Removing a random distraction from the corner of a photo usually keeps the memory intact. Rebuilding large parts of a background can change what the moment felt like.
This is especially important with older family photos. If you scanned a print from the 1980s, the small flaws are often part of its history. You may want to brighten it, reduce blur, or improve contrast. You may not want to turn it into something that no longer feels like the original photo your family remembers.
There is also a privacy angle here. AI editing features work by analyzing image content closely. For casual snapshots, that may feel harmless. For decades of family scans, children’s photos, or personal images, it is worth deciding which photos belong in a cloud library and which ones should stay offline or be edited more sparingly.
Unblur can rescue photos you care about
Some pictures are worth keeping even if they are not technically sharp.
A child blowing out candles. A grandparent laughing. A pet looking at the camera for half a second. If the image is a little soft, Unblur can improve detail enough to make it more usable for sharing or printing. That is especially helpful with older scans, where a photo may be slightly fuzzy before you even start editing.
Keep expectations realistic. Unblur can improve an almost-there photo. It will not turn a badly damaged image into a studio portrait.
Portrait effects and finishing touches
Portrait-style effects can add background blur after the photo was taken. Used lightly, this can help the subject stand out, especially when a room or yard feels busy.
It tends to work best on:
- one-person portraits
- pet photos with distracting backgrounds
- indoor shots with clutter behind the subject
Skip it if hair, glasses, or overlapping objects confuse the edge detection. Those mistakes are hard to ignore once you notice them.
If you like printing edited favorites or displaying them at home, polished portraits and restored family scans also look great on a Skylight Digital Frame.
A practical edit order
If you are unsure where to begin, use this sequence:
| Step | Why it comes first |
|---|---|
| Crop and straighten | Composition fixes often solve the biggest problem first |
| Light and color | Makes the image easier to read before deeper edits |
| Unblur if needed | Sharpness decisions make more sense after framing is set |
| Magic Eraser | Remove distractions after the main image looks right |
| Final review | Check faces, textures, and old scans for unnatural results |
If you want to compare Google Photos with other beginner-friendly tools before building your routine, this guide to best photo editing apps might be useful.com/best-photo-editing-apps-for-beginners/">best photo editing apps for beginners is a helpful reference.com/best-photo-editing-apps-for-beginners/">best photo editing apps for beginners is a useful next read.
Sharing Memories and Managing Your Storage
People often think sharing and storage are separate jobs. In Google Photos, they’re tightly connected.
The more confidently you share from the cloud, the less pressure you feel to keep every file sitting on your phone forever.

Pick the sharing method that fits the moment
Not every sharing option serves the same purpose.
Here’s a simple comparison:
| Sharing option | Best for | Watch out for |
|---|---|---|
| Single photo or video share | Sending one or two images fast | Easy to create clutter in message threads |
| Shared album | Trips, weddings, school events, family recaps | Album management takes a little upkeep |
| Partner sharing or automatic sharing | Ongoing household photo access | Needs trust and clear account boundaries |
| Download and send outside Google Photos | Recipients who don’t use Google services | Creates extra copies to manage |
If you’re sharing with a spouse, parent, or close family member regularly, a shared album usually feels cleaner than repeatedly texting batches of images.
If you’re sharing one special photo, simple direct sharing is enough.
Cinematic photos make still images more fun to send
Google Photos also has a creative sharing option that many people miss.
Verified guidance notes that Cinematic photo conversion turns a still image into a 4-second video clip. To create one, open a photo with clear foreground and background separation, tap the three-dot menu, choose Create, then Cinematic. The AI adds subtle motion such as a parallax shift, and this format has been reported to drive 3x engagement uplift on social platforms (YouTube reference).
This works especially well for:
- wedding portraits
- travel scenery
- photos of kids or pets
- milestone event pictures
It’s a nice option when a still photo feels a little flat but you don’t want to build a full video slideshow.
When to use Free up space and when to upgrade
This decision trips people up because both options solve different problems.
Free up space is best when:
- your photos are safely backed up
- your phone storage is tight
- you’re comfortable relying on cloud access for older images
Upgrading storage is best when:
- you don’t want constant cleanup decisions
- you store a large amount of photos and videos in Google
- multiple services tied to your account are using your space
The key is trust, but verify first. Before removing local files from the phone, make sure backup has completed and spot-check a few older images from another device if possible.
If your phone is already warning you about low storage, this guide on reclaiming space is a useful companion: https://www.simplytechtoday.com/how-to-free-up-storage-space/com/how-to-free-up-storage-space/com/how-to-free-up-storage-space/
Share beyond your phone
A cloud photo library is more enjoyable when it leaves the app.
For example, many families like sending selected albums to a digital frame in the kitchen or living room. If that idea appeals to you, this overview of the Skylight Digital Frame gives a practical sense of how a shared photo display fits into everyday life.
A photo library feels more valuable when the best pictures surface regularly, not just when you open the app and go looking for them.
Advanced Tips Privacy Settings and Troubleshooting
Google Photos is convenient partly because it does a lot automatically. That’s useful, but it also means you should check what’s turned on instead of assuming the defaults match your comfort level.
This matters most with AI features.
Review privacy settings with intention
A frequently overlooked issue is Google Photos’ Crowdsource style AI training prompts. Reporting covered by Chrome Unboxed describes how users may be asked to identify photo contents, such as whether an image shows a certain event, and those responses can help improve search and machine learning. That same coverage notes that official explanations often focus on benefits while saying less about how user responses can train models on private libraries. If privacy matters to you, watch for prompts inside the app and look for available settings that limit these contributions (Chrome Unboxed).
The practical takeaway isn’t “never use AI.” It’s “use it on purpose.”
Check areas such as:
- Face grouping settings
- Location-related controls
- Sharing settings
- AI feature prompts and feedback options
- Any contribution or personalization toggles available on your device
If a prompt asks you to label personal images and you’re not comfortable with that, skip it.
A balanced way to think about AI in your photo library
AI features can help with real tasks. Search gets smarter. Memories surface more naturally. Accessibility can improve for some users.
But convenience and privacy aren’t the same thing.
Ask yourself:
- Do I want the fastest, smartest search possible?
- Am I comfortable giving more feedback to improve those tools?
- Would I rather keep some features limited and do more manual organizing myself?
There isn’t one right answer.
Some people want every smart feature switched on. Others want backup and basic search, but little else. Both approaches are reasonable.
If you want a broader checklist for digital privacy habits, this guide is a good next step: https://www.simplytechtoday.com/how-to-protect-privacy-online/com/how-to-protect-privacy-online/com/how-to-protect-privacy-online/
Fix common Google Photos problems without panicking
Most issues come down to a few common causes.
Backup is stuck
Check Wi-Fi, battery saver settings, and whether background data is restricted.A photo won’t show up in search
Confirm it was backed up. Then check whether the date or metadata is wrong.Editing tools seem unavailable
Some tools depend on cloud backup first. Reopen the app after the image finishes syncing.Scanned photos appear in the wrong part of the timeline
Correct the date information so the app can place them properly.You’re seeing too many screenshots or junk images
Revisit which folders are set to back up.
Frequently Asked Questions About Google Photos
If I delete a photo on my phone, will it delete from Google Photos too
It can, depending on how you delete it and whether the photo is synced. The safest habit is to check whether you’re deleting from the device only or from your Google Photos library. If a picture matters, confirm it’s backed up before removing anything.
Can I use Google Photos just as a backup app
Yes. Many people do. You don’t have to use every AI feature, album suggestion, or edit tool. You can treat it mainly as cloud backup plus basic search.
What happens if I stop paying for extra Google storage
You may lose the ability to add more content once your account storage is full. It’s smart to review your storage use early, export important files, and decide whether you want to reduce your library or keep paying for more room.
How do I export my whole photo library
Use Google’s account export tools to download your data. If your library is large, expect the export to take time. It’s worth doing occasionally if you want an offline copy of your memories.
Why are my scanned photos hard to find
The most common reason is bad metadata. If scans have the wrong dates or incomplete details, search won’t understand them as well. Fix the date first, then test search again.
Is Google Photos good for family sharing
Yes, especially for shared albums and ongoing family photo collections. It works best when everyone agrees on which account owns the main library and how photos will be shared.
If you like straightforward guides that make confusing tech feel manageable, visit Simply Tech Today for more practical explainers, troubles...simplytechtoday.com) for more practical explainers, troubles...com) for more practical explainers, troubles...simplytechtoday.com) for more practical explainers, troubles...simplytechtoday.com) for more practical explainers, troubles...simplytechtoday.com) for more practical explainers, troubleshooting tips, an...com) for more practical explainers, troubleshooting tips, an...com) for more practical explainers, troubleshooting tips, and how-tos.simplytechtoday.com) for more practical explainers, troubleshooting tips, and how-tos.com) for more practical explainers, troubleshooting tips, and everyday advice on apps, devices, privacy, and digital life.

Member discussion