
How to Turn Off Subscriptions on iPhone: 2026 Guide
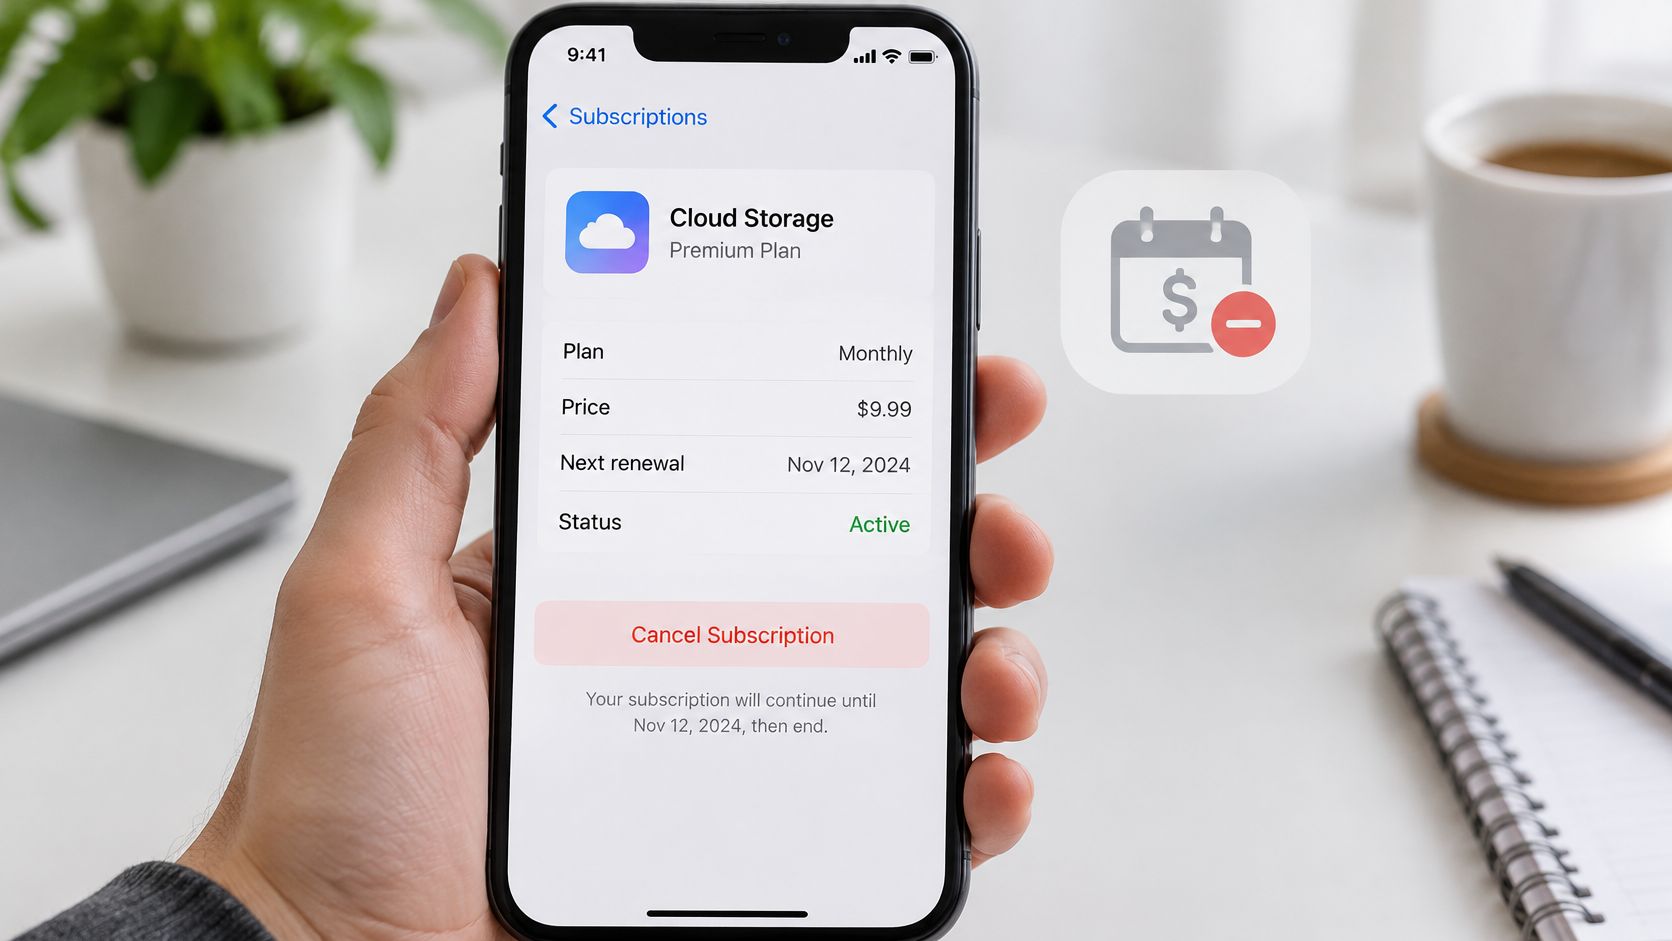
You deleted an app you weren't using, but another charge has appeared on your statement. Or you've opened the app, searched its menus, and found plenty of offers to stay but no obvious way to leave. The important question isn't whether the app is on your iPhone. It's who bills you for the subscription.
To turn off subscriptions on iPhone, start with your Apple Account. Then verify the cancellation, identify any charges billed elsewhere, and handle an existing payment separately if you want a refund.
Why Deleting the App Never Stops a Charge
Say you remove a fitness app from your Home Screen after deciding you won't use it anymore. Later, the same monthly payment appears. Removing the app changed what was installed on your phone, not the subscription agreement attached to your account.
For an Apple-billed subscription, the app provides access to the service, while your Apple Account holds the recurring billing arrangement. That's why deleting an app isn't a reliable cancellation method.
People usually look in the app itself, on its App Store page, or in Subscriptions in Settings. Of those places, Settings is the right starting point for subscriptions purchased through Apple's billing system. An app downloaded from the App Store can still have a subscription purchased directly from its provider, so the download location alone doesn't establish who handles payment.
Practical rule: Cancel where the payment agreement lives, not where you happen to use the service.
Cancellation addresses future renewal. It doesn't automatically reverse a payment that's already gone through.
Make your first check now: open Settings, tap your name, then choose Subscriptions. If the subscription appears, you can manage it there. If it doesn't, investigate the purchasing account or billing provider rather than repeatedly reinstalling and deleting the app.
How to Cancel Your Subscription in Settings
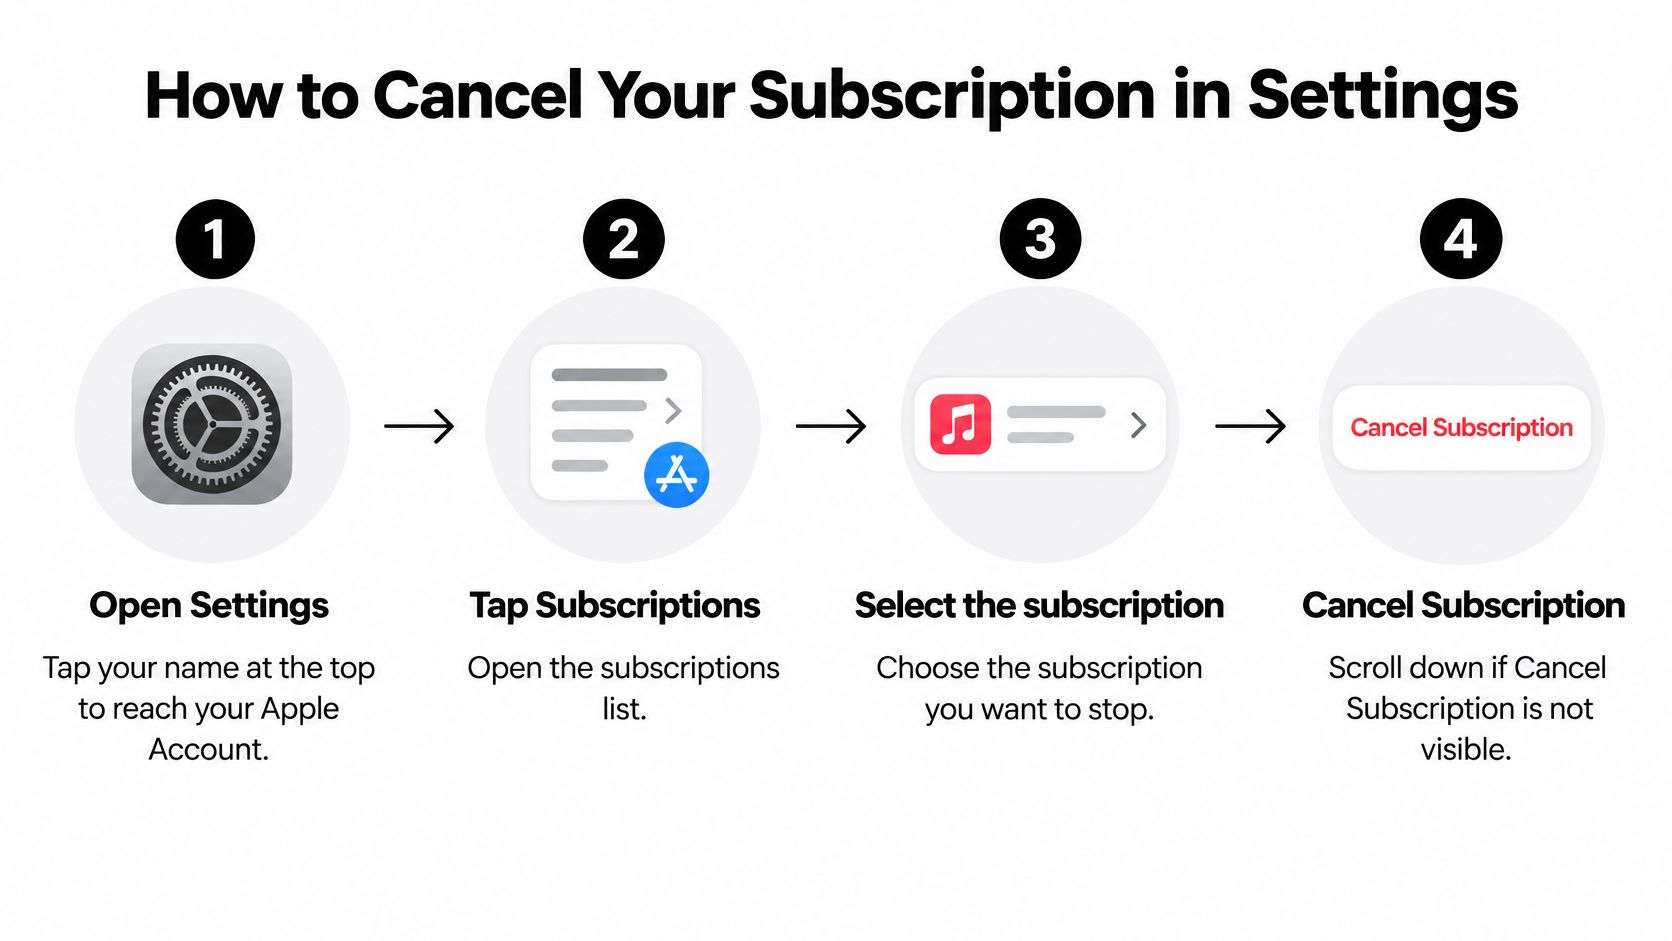
Use the account-level cancellation screen rather than hunting through the app's menus. Apple's iPhone cancellation instructions give the path as Settings > your name > Subscriptions, followed by selecting the subscription and choosing Cancel Subscription.
The process is straightforward, but don't stop before checking the result.
- Open Settings and tap your name at the top. This opens your Apple Account, where Apple-billed subscriptions are managed independently of the apps installed on your phone.
- Tap Subscriptions. Use this account list instead of treating an app's pause offer, discount, or account-deletion option as proof that renewal has stopped.
- Select the subscription you want to end. Check the service and plan carefully so you don't cancel a different subscription with a similar name.
- Scroll down, tap Cancel Subscription, and confirm if prompted. The cancellation control can sit lower on the subscription screen, so don't assume it's unavailable just because it isn't immediately visible.
Verify the result before leaving Settings
Look at the subscription screen again immediately after confirming. A changed status is your evidence, not the fact that you tapped a button or closed the app.
For a paid subscription, access normally continues through the remaining subscription period. Read the displayed expiration information rather than assuming that cancellation either removes access immediately or gives you another full billing period.
Don't select a cheaper plan merely to escape an unwanted subscription. A plan change still leaves you subscribed, and a pause isn't the same instruction as ending renewal.
The useful finishing point is an expiration status you can verify, not an app you've removed from your Home Screen.
Review the rest of the account
While you're in the subscription list, check for other services you no longer need. Keep subscriptions you actively use, but don't leave an unwanted plan running just because its individual payment seems small.
For a broader review of recurring app spending, you can manage iPhone subscription costs with Compass+. Use that resource alongside the actual renewal and expiration information in your account, which determines what still needs action.
What Each Status Message Means
The wording on the subscription screen shows whether renewal is still scheduled. A missing Cancel Subscription button or a red expiration message with a date means the subscription is already canceled. If you can't find it, check the Apple Account used to buy it or the provider that bills you.
Subscription status on screen and what it means
| What You See | What It Means | What to Do |
|---|---|---|
| Cancel Subscription button still present | Active, with renewal scheduled on the date shown | Tap Cancel Subscription and confirm |
| Red expiration message with a date | Canceled, with access scheduled to end on that date | Nothing more to cancel; save a screenshot |
| Cancel button gone, no red message | Already canceled or lapsed | Check the expiration information under the subscription |
| Subscription not listed | It may belong to another Apple Account or be billed by a carrier or provider | Check the purchasing account or contact the billing provider |
| App deleted but still listed as active | Billing continues despite removing the app | Cancel in Settings, not on the App Store listing |
Use the date as your reference
The expiration date shows when access is scheduled to end. Your cancellation date records when you acted, and may be different.
Save a screenshot showing the subscription name and its expiration status. An empty Home Screen or an app's sign-out page does not show whether billing has stopped.
If the status is unclear, leave the screen and reopen it after a short interval. Read the wording before taking further action.
For a subscription you can't find, check the receipt to identify the purchasing account or billing provider. If a carrier or another provider handles the charge, cancel through that provider. Settings can't end a billing agreement Apple doesn't manage.
Family Sharing and Who Can Cancel
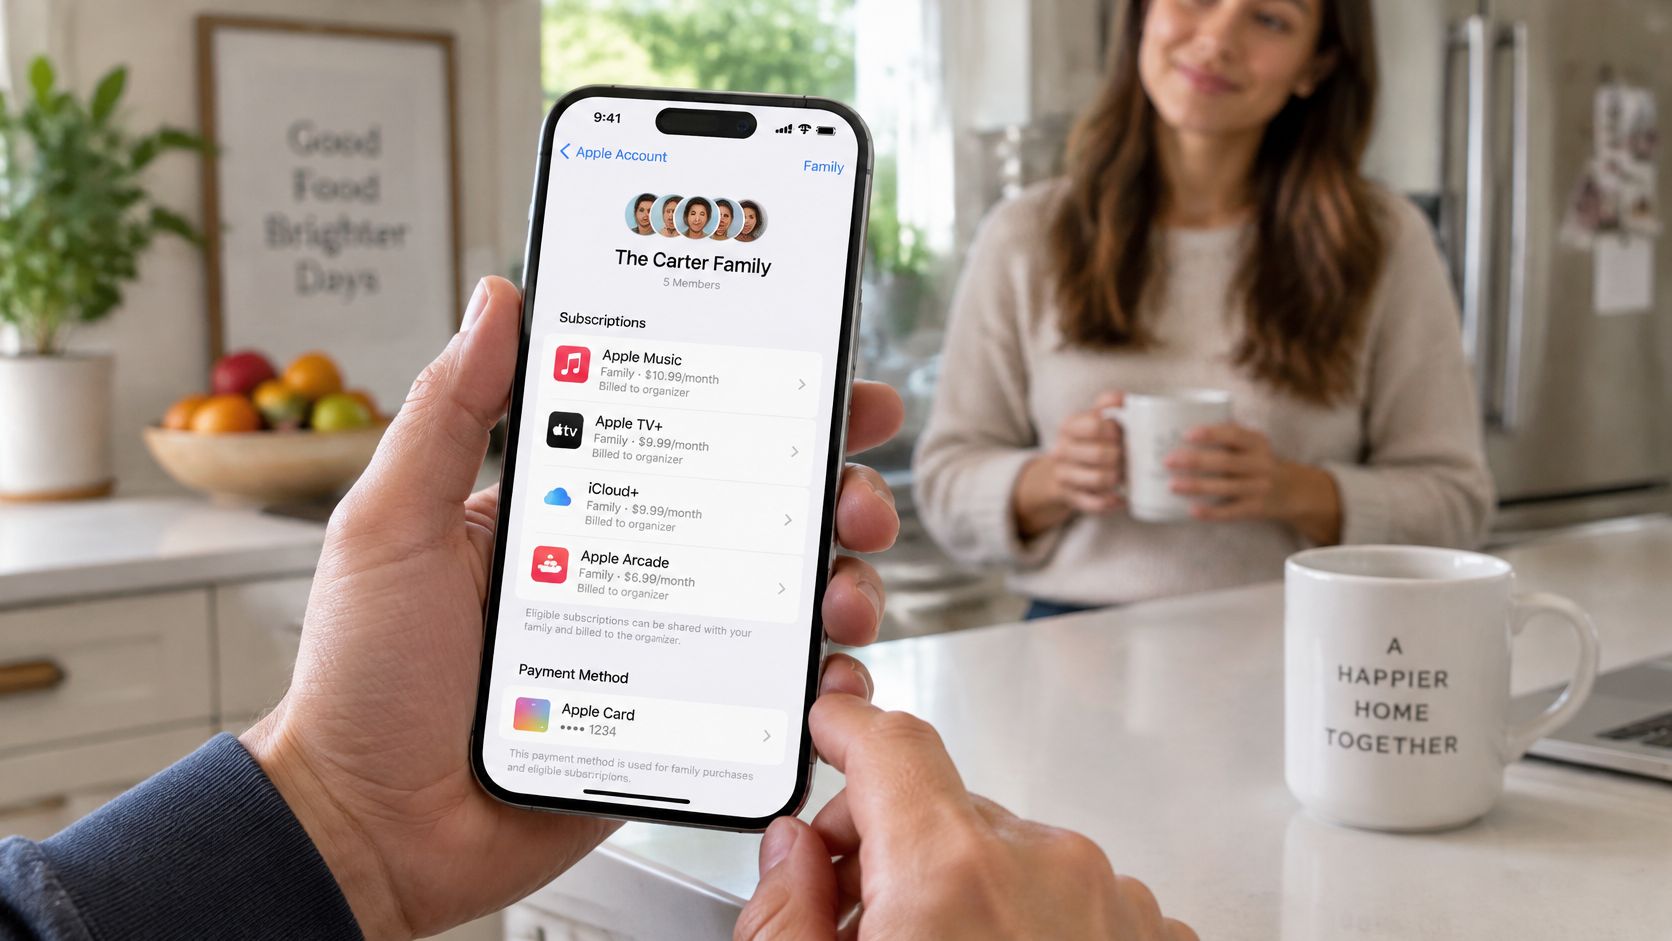
A parent sees a recurring charge on the family card for a teenager's app, but the subscription isn't listed on the parent's iPhone. That doesn't necessarily mean the payment is unrelated to the family. The person paying and the person who owns the subscription can be different people.
Apple's Family Sharing guide explains that eligible purchases can use the organizer's default payment method when Purchase Sharing is enabled, while family members retain their own Apple Accounts; eligible subscriptions can be shared with up to five family members.
Who can cancel a shared subscription
| Your Role | Can You Cancel From Your iPhone | What to Do |
|---|---|---|
| Account holder who pays for their own subscription | Yes, when it belongs to the account signed in on your iPhone | Cancel in Settings > your name > Subscriptions |
| Family member using a shared subscription | Usually no, unless you're also the subscriber | Ask the subscription owner to cancel; changing your shared access alone won't stop renewal |
| Organizer whose card was charged for a member's purchase | Yes for your own subscriptions, not automatically for a member's | Identify the purchasing account and have its holder cancel; review Purchase Sharing separately |
| Organizer who only wants to stop access | You can manage sharing, but that doesn't cancel renewal | Turn off the relevant sharing option in Family Sharing settings |
Separate payment, ownership, and access
For the parent-and-teen example, start by identifying whose Apple Account purchased the subscription. If it's the teenager's account, looking only at the organizer's subscription list won't resolve it.
Turning off sharing and canceling a subscription are different actions. One changes access or the family payment arrangement. The other stops the underlying subscription from renewing.
Don't remove someone from the family group as a substitute for cancellation. First establish whether you own the subscription, merely use shared access, or pay for another member's purchase. Then have the account holder take the cancellation action.
Find Charges You Do Not Recognize
You spot a monthly payment on your statement, but the billing description doesn't match any app you remember downloading. Don't cancel a familiar subscription just because its price looks close. Match the transaction before deciding what to stop.
Apple's billing support recommends searching purchase history by the charged amount and allows you to expand beyond the default Last 90 days view. That gives you a better starting point than guessing from the statement's wording.
Match the payment to the purchase
Open Apple's purchase-history service through its billing support page and sign in with the Apple Account you used for purchases. Compare the transaction with your statement using these details:
- Amount charged: Search for the payment amount instead of relying only on an app's name.
- Transaction date: Check that the purchase record corresponds to the payment you're investigating.
- Account used: If nothing matches, inspect the receipt for another Apple Account or a family member's purchase.
- History filter: Expand the date range when the relevant transaction falls outside the current view.
Once you've identified a subscription, open its management screen and stop renewal if you no longer want it. Keep the receipt or transaction record if you're also considering a refund.
Compare statements for repeated charges, but don't require an exact monthly date match before investigating. Subscriptions can have different billing intervals, and the purchase record is more useful than an assumed schedule.
If the payment doesn't appear in the relevant Apple purchase history, check the statement and receipt for the actual billing provider. A service used on your iPhone isn't necessarily a service billed through Apple.
How to Request a Refund for a Charge
Cancel first, then request the refund. Treating those as separate tasks prevents you from leaving renewal active while you wait for a decision about an existing payment.
Apple says some purchases may qualify for a refund, but approval isn't guaranteed. Its refund request instructions say an update generally arrives within 24 to 48 hours, and an approved refund can take additional time to reach the original payment method.
Submit the request from the charged account
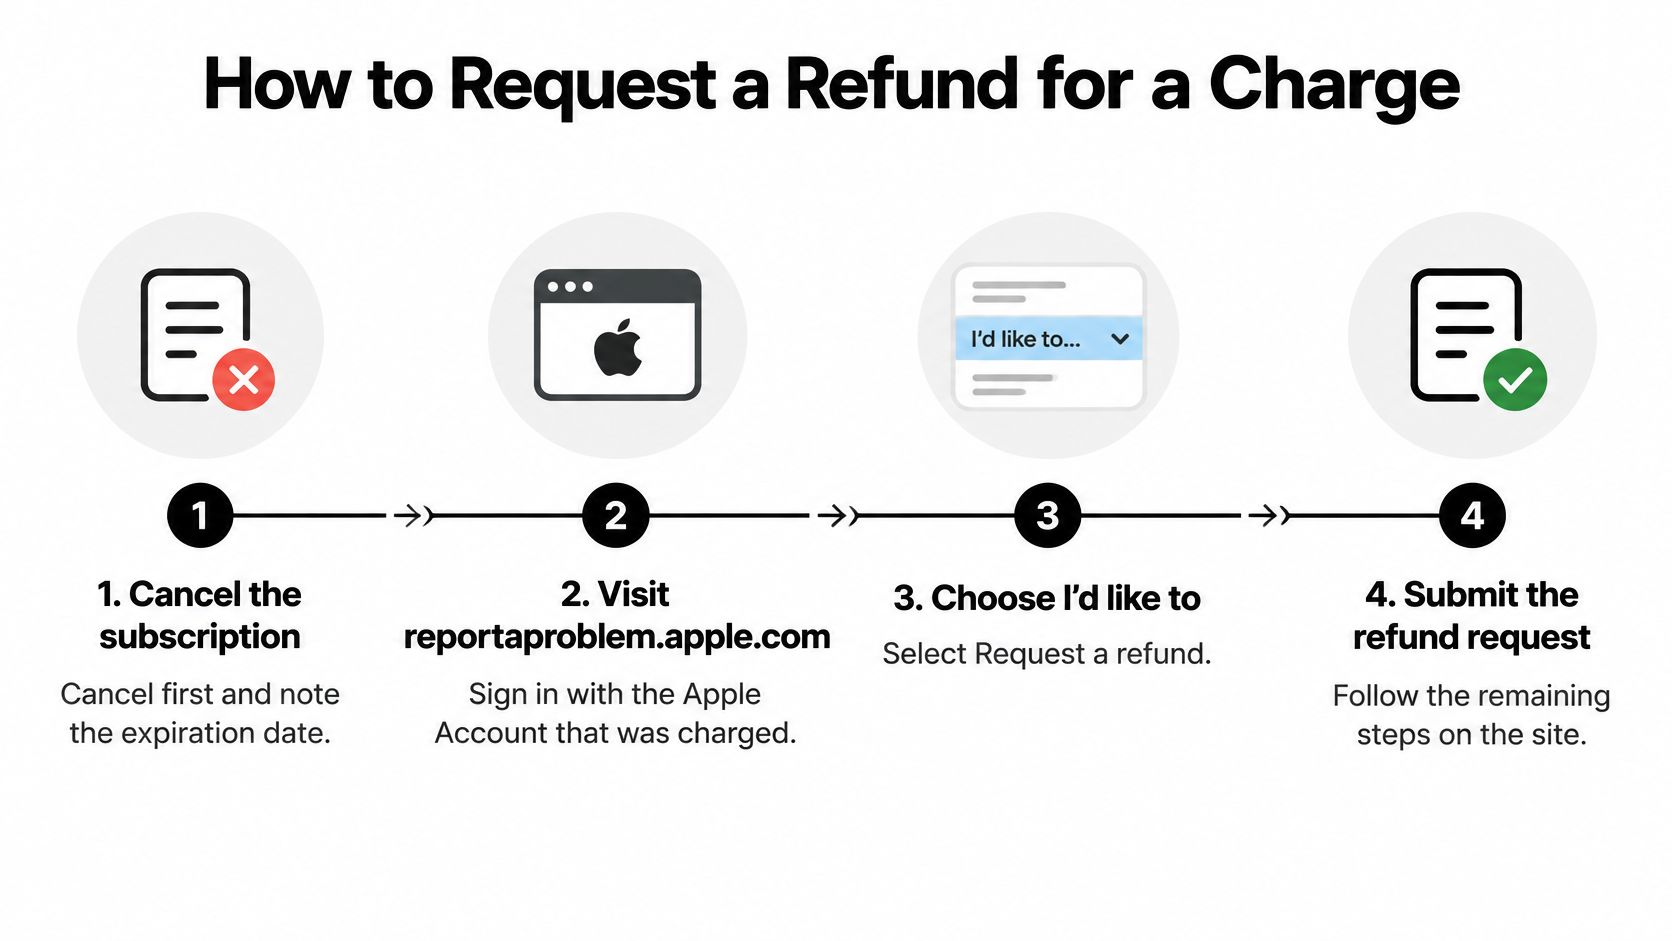
- Cancel the subscription and record its expiration status. This addresses renewal while you pursue a decision about the payment already taken.
- Visit Apple's Report a Problem service and sign in. Use the Apple Account associated with the charge so the relevant purchase can appear.
- Under I'd like to, choose Request a refund. Select the refund workflow rather than assuming cancellation has already submitted a request.
- Choose the reason that accurately matches what happened. Describe the actual issue rather than selecting a reason only because it sounds more likely to succeed.
- Select the subscription charge and submit. Check that you're requesting a refund for the intended purchase, especially if the account has several similar transactions.
Keep the request and payment records together
Save the purchase receipt, cancellation status, and any refund confirmation. Each records a different part of the process: what you bought, whether renewal has ended, and whether Apple has accepted the refund request.
A submitted request isn't an approved refund. Likewise, an approval doesn't mean the money will appear in your bank or card account immediately.
Keep these separate: Cancellation controls renewal. A refund decision concerns a payment already processed.
Monitor the request through the reporting service instead of using the subscription's expiration screen to infer refund progress. The subscription screen isn't a bank-payment tracker.
If the request is declined, review the purchase details and the reason you submitted. Keep your records and use Apple's support options if you need help understanding the decision or identifying the correct transaction.
Don't assume a declined refund means cancellation failed. Verify each outcome in its own place, and don't restart an unwanted subscription while trying to resolve the payment.
Cancel, capture the expiration status, submit the refund request, then monitor it.
Make a Quarterly Subscription Check
Open Settings > your name > Subscriptions and give every entry a deliberate decision: keep it or end renewal. Check the plan name and the renewal or expiration information, rather than judging only by whether you recognize the app.
Pay particular attention to services you've stopped using, overlapping subscriptions, and plans another household member may already provide through sharing. Keep what serves a purpose. Cancel what you're retaining only because you haven't looked at it.
Put the review on your calendar
Make a quarterly subscription review a routine, not a response to an unwelcome statement. Add a separate reminder before any renewal you're still deciding about, leaving yourself time to check the plan and act.
Your review should include payments that aren't in Apple's list:
- Apple-billed plans: Inspect and manage them in your account's Subscriptions screen.
- Carrier or provider bills: Use the billing account named on the receipt or statement.
- Shared subscriptions: Confirm who owns the plan before asking someone to change it.
Don't judge success by how many apps you've removed. Judge it by whether each unwanted renewal has a verified outcome and each unexplained charge has an identified owner.
Start with the subscription that prompted you to search today. Open its account record, make the cancellation decision, and save the resulting status before moving on.
Tech Today offers practical guides that make everyday device tasks easier, from setting up a new iPhone after Android to updating an LG Smart TV. Visit Simply Tech Today for clear instructions that help you manage your devices and accounts without unnecessary jargon.
Member discussion