
How to Transfer Photos to Computer: USB, AirDrop and Cloud
Your phone's storage is nearly full, your camera card needs clearing, and the photos you want to keep are scattered across devices. You plug in a cable, but the computer either sees nothing or imports files you can't open.
Learning how to transfer photos to computer storage means handling copying, checking and backing up as separate jobs. Start with the connection that suits your devices, preserve the originals, then confirm what arrived before clearing any space.
Pick the Transfer Method for Your Device
Best transfer method by device and computer
| Source device | Computer | Best method | What you need |
|---|---|---|---|
| iPhone | Mac | AirDrop or the Photos app | Bluetooth and Wi-Fi on, or a USB cable |
| iPhone | Windows PC | Photos app over USB, or iCloud for Windows | Data-capable cable and an unlocked phone |
| Android phone | Windows PC | USB cable in File Transfer (MTP) mode | Data-capable cable and an unlocked phone |
| Android phone | Mac | Android File Transfer, if already installed and compatible, or Google Photos | Compatible Android file-transfer app and USB cable, or browser access to Google Photos |
| Digital camera | Any computer | Direct USB cable or SD card reader | Camera cable or card reader and the memory card |
| Any phone or camera | Any computer | Cloud sync through iCloud Photos or Google Photos | Account, internet connection and enough cloud storage; cameras may need an intermediate upload device |
Pick the row that matches both ends of the transfer. An Android phone doesn't appear in the Mac's Finder like an external drive, so it needs compatible transfer software or a browser-based route. Don't build a new workflow around an old Android File Transfer installer from an unfamiliar download site.
For a mirrorless camera shooting RAW files, I'd use a card reader. It gives you direct access to the recorded files without relying on an import app's selection, conversion or format support. A camera cable doesn't compress photos, but an application may import only selected versions.
If you already use cloud storage and have a reliable connection, syncing may require the least setup. Compare free photo storage options before committing a library, especially if you're close to your account's limit.
Choose for the job: Use wireless sharing for selected pictures, cloud sync for ongoing access, and a cable or card reader for a large offline collection.
For a wired connection, follow How to Copy Photos With a Cable or SD Card. For an account-based or nearby-device transfer, use Wireless Options Like AirDrop, iCloud and Google Photos.
How to Copy Photos With a Cable or SD Card
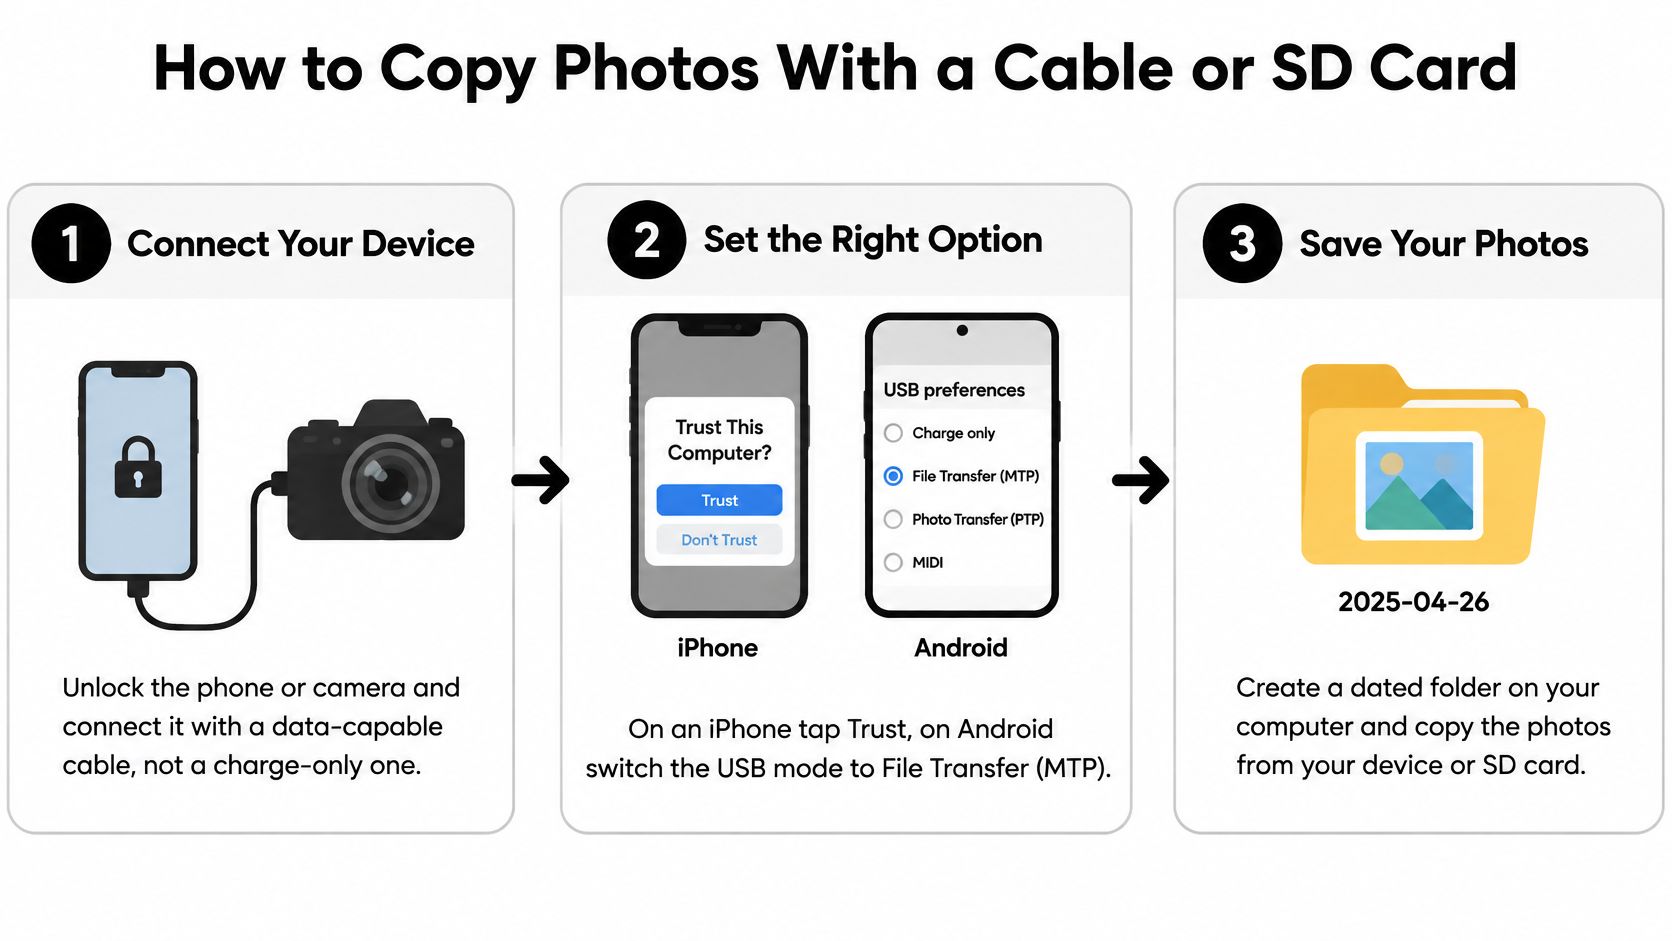
Connect with a data-capable cable. Access the phone and connect it directly to the computer, preferably with a short, reputable cable. A charge-only cable can supply power without making the phone's files accessible.
Approve access on the device. On an iPhone, tap Trust if prompted and enter the passcode. On Android, open the USB notification and select File Transfer or MTP, rather than leaving it in charging mode.
Prepare the destination. Create a folder inside Pictures with the shooting date and event name, such as Year-Month-Day Holiday. Check available disk space before importing, especially if the selection includes long videos or RAW files.
Choose the import route. In Windows Photos, choose Import and select the connected device; on a Mac, select the iPhone in Photos and choose the pictures to import. For Android on Windows, open the phone in File Explorer, browse internal storage or the card, and look in DCIM and Pictures.
Copy rather than move. Use Copy and Paste for visible folders, or leave any import-and-delete option disabled. Keep both devices awake and avoid an unpowered hub; if a transfer repeatedly fails, copy smaller batches.
For a memory card, use a reader. Turn the camera off before removing its card, then engage the card's write-protect switch if supported. Copy the DCIM folder, along with any other folders containing media you need, without reorganizing files on the card itself.
Eject before disconnecting. Wait until copying finishes, then use the operating system's eject control where available. Don't pull a card while its reader is still active.
Don't confuse connector shape with speed
A USB-C plug doesn't tell you the cable's data capability. The guide to USB-C data transfer helps distinguish the connection from what the cable can carry.
The USB-IF packaging guidelines identify USB 3.1 Gen 1 as 5 Gbps and Gen 2 as 10 Gbps, but those link rates aren't guaranteed file-copy speeds. Phone storage, card readers and many small files can slow the operation considerably.
A completed import should leave accessible, full-resolution files in the destination. Treat that as the start of verification, not permission to erase the source.
Wireless Options Like AirDrop, iCloud and Google Photos
Wireless and cloud transfer options compared
| Method | Best for | Originals kept? | Watch out for |
|---|---|---|---|
| AirDrop | Selected photos from iPhone to Mac | Usually, but check sharing options for original formats and data | Devices must be nearby with Bluetooth and Wi-Fi on |
| iCloud Photos | Keeping an iPhone library synced to a Mac | Yes, when originals are downloaded | Storage limits and synchronized deletions |
| Google Photos | Android users and mixed-device households | Original quality uploads preserve resolution; Storage saver can reduce it | Upload quality and account storage |
| Messaging or email apps | A small selection for immediate viewing | Messaging often compresses; email attachments can preserve originals | Image resizing and attachment limits |
AirDrop avoids a cloud upload. On the iPhone, select pictures in Photos, tap Share, choose AirDrop and select the Mac. Accept the transfer if prompted, then check where the files were saved, usually Downloads when received as files.
For iCloud Photos, enable syncing on the iPhone and Mac using the same Apple Account. In the Mac's Photos settings, choose Download Originals to this Mac if you want the full files stored locally, rather than optimized versions that depend on later downloads.
Access in an app isn't always a local copy
With Google Photos, wait until the phone finishes backing up before opening the library in your computer's browser. Select the pictures and download them, then extract any downloaded archive before checking its contents. The Google Photos walkthrough explains the account and library controls.
Check upload quality before trusting a downloaded file as your archive. A download can't restore detail that was discarded during an earlier reduced-quality upload.
Cloud deletion deserves particular care. A parent clearing an iPhone's library through iCloud Photos can also remove those family pictures from the synced Mac library. Read the deletion prompt, and distinguish deleting from the library from a feature specifically designed to remove only local device copies.
Messaging apps are convenient for sending a picture to someone, not for preserving a collection. If email is your only practical route, attach the actual file and decline resizing instead of pasting a reduced image into the message.
Choose sync for continuous access across devices. Choose a downloaded folder, cable or card reader when you need an offline collection you control.
Fix Failed Transfers and Unexpected Photo Formats
Transfer symptoms, causes and fixes
| Symptom | Likely cause | Fix |
|---|---|---|
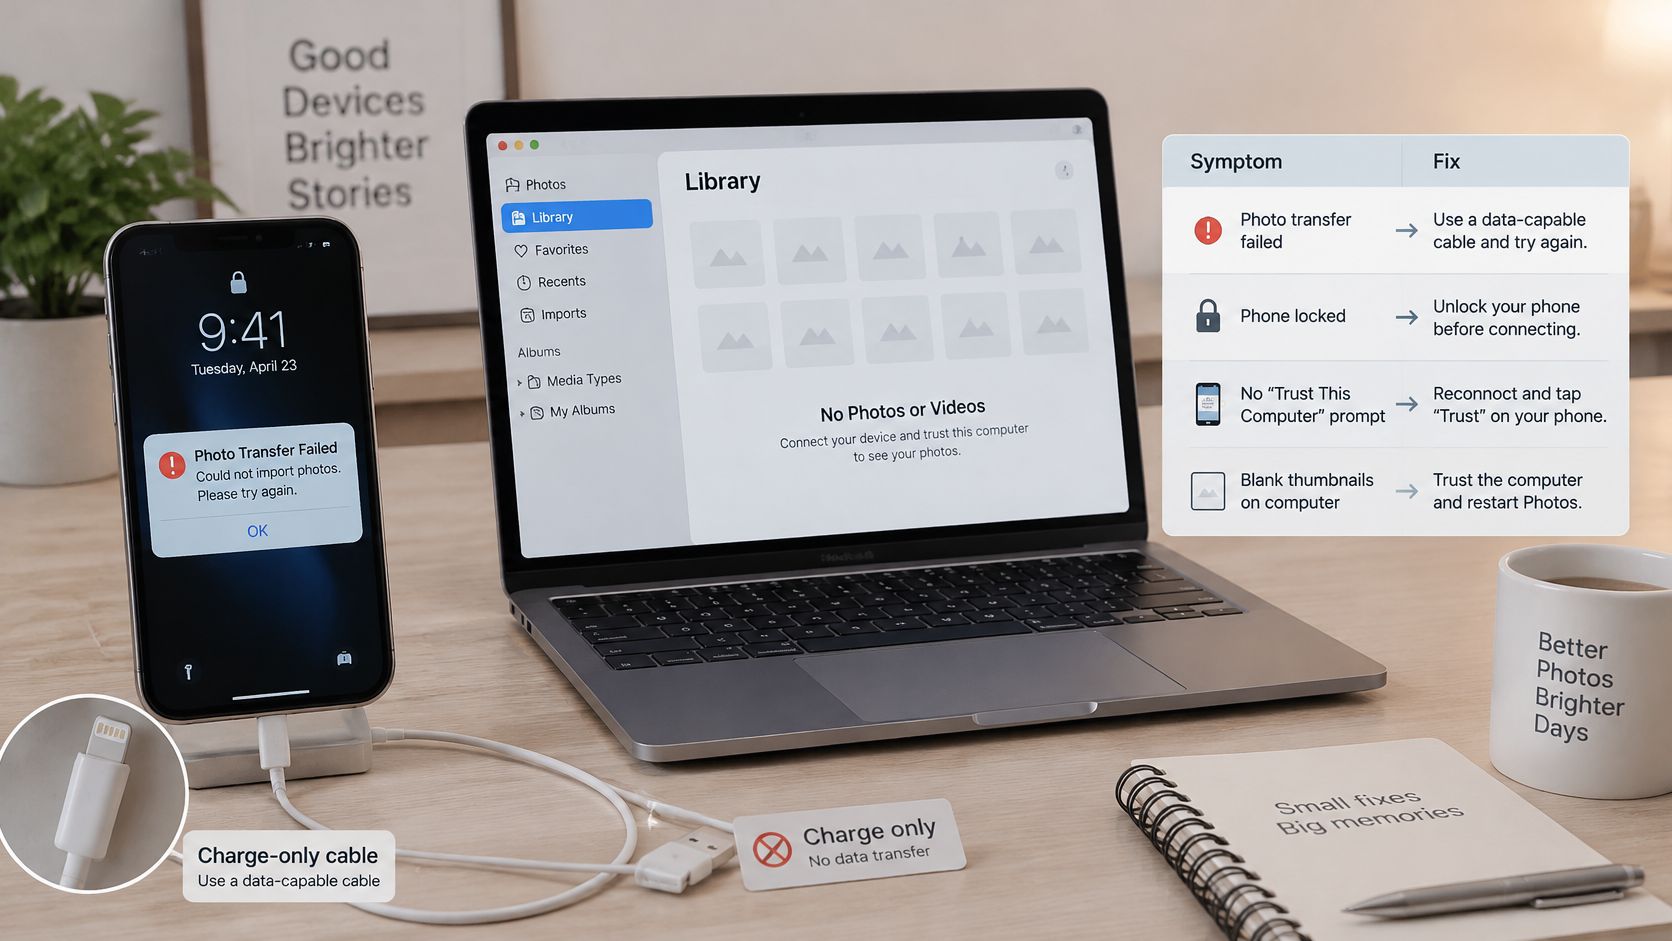
| Computer does not detect the phone | Charge-only cable, locked screen or missed Trust prompt | Try a known data cable, unlock the phone and approve access |
| Thumbnails are blank but files import | Unsupported HEIF thumbnail preview | Open the full file in a current viewer before judging the copy |
| Photos arrive as JPEG, not HEIC | iPhone is converting media during transfer | Select Keep Originals before importing |
| Videos won't play | Player lacks support for the video format or codec | Use a compatible player or export a separate H.264 copy |
| Transfer stops at large files | Camera-to-Android USB restrictions or destination filesystem limits | Try a card reader and check the destination filesystem |
Start with detection, not software installation. Try another data-capable cable and a direct computer port, keep the phone active, and look for a permission prompt hidden behind another screen. If Windows still can't recognize an iPhone, check that the relevant Apple device software is installed and current.
Separate an unreadable file from a missing file
A blank thumbnail doesn't establish that the transfer failed. Some viewers can't generate previews for HEIF or camera RAW files even when the full file is present. Check its extension and size, then open it in software that supports that format.
Apple's HEIF and HEVC support guide explains that importing media can convert HEIF to JPEG and HEVC to H.264, while Keep Originals preserves the source formats. On an iPhone, look in Photos settings under Transfer to Mac or PC; the precise settings path can differ by software version.
Choose the outcome deliberately:
- Easy viewing: Use software that supports your existing files.
- Broad compatibility: Make JPEG photo exports or H.264 video exports for sharing.
- Archival preservation: Retain the original HEIC, HEVC or RAW file, alongside any convenient converted copy.
Don't convert your only copy just to make a thumbnail appear. Conversion changes the file, and some export routes can discard metadata or editing information.
Keep related files together
A Live Photo can export as a still image plus a short video. Keep matching filenames together, and don't delete the video component as an apparent duplicate. RAW-and-JPEG camera pairs also represent different versions, not necessarily redundant files.
If a large video repeatedly stalls, test it separately. A card reader can bypass a camera's USB-transfer restriction, but it won't fix a destination drive that can't store the file.
Test a small, varied batch before committing the library. Include the formats you shoot, and keep the source originals until both preservation and playback are settled.
Confirm Every File Arrived Before You Delete Anything
A successful copy dialog means the operation finished without a reported error. It doesn't establish that you selected every folder, retained original formats or received playable videos.
The Library of Congress data-integrity guidance recommends creating fixity information early and using cryptographic hashes to monitor file integrity. For a personal library, combine that principle with straightforward checks.
Check the collection and its contents
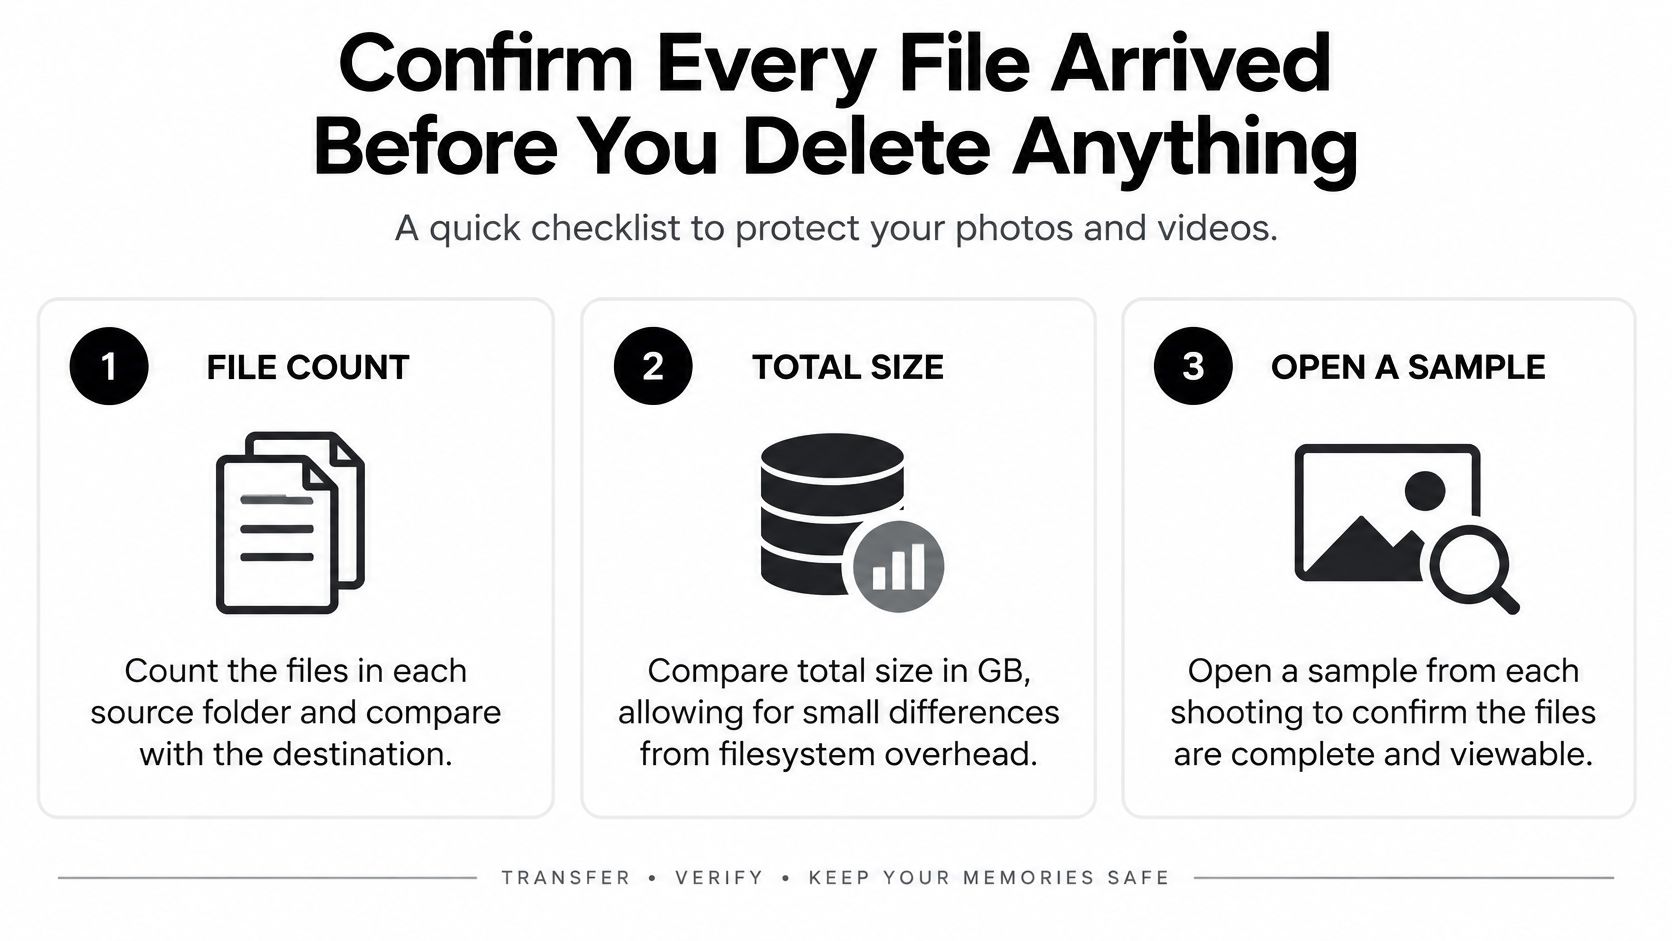
Compare file counts by folder. Don't compare the phone app's photo total blindly with a computer's file total. Live Photos, RAW pairs and sidecar files can make those totals legitimately different.
Compare actual file sizes. Use file size rather than “size on disk,” which includes filesystem allocation differences. An unexplained shortfall needs investigation, especially when the intended transfer was unchanged originals.
Open representative files. Check pictures from different shooting days, zoom in to full size, and play videos beyond their opening frame. Include RAW files and edited pictures if they're part of the collection.
Inspect capture metadata. Look for Date taken or the embedded capture date, not merely the computer's file creation date. A newly created destination file can still contain the correct original shooting date.
Compare hashes for unchanged originals. On macOS, run
shasum -a 256 "/path/to/photo"; on Windows, usecertutil -hashfile "C:\path\photo" SHA256. Compare source and destination results where both files are accessible as ordinary files; phone MTP storage may require a different verification route.
Matching hashes show that the compared files are byte-for-byte identical. A converted JPEG won't match its source HEIC, even when both display correctly.
Don't delete until counts, sizes, capture dates and visual checks agree, with matching hashes wherever you're verifying unchanged originals. Then protect the verified collection independently.
Why a Transfer Is Not a Backup
Copying photos to a laptop and then wiping the phone moves the risk, it does not remove it. One failed drive, one theft, one mistaken delete and the collection is gone. A transfer finishes when files land. A backup finishes when you can get them back after something breaks.
That distinction matters because loss is common. In a 2025 international survey of 6,118 people across 10 countries, 63% said they had experienced data loss through device failure, accidental deletion or cyberattacks, according to Western Digital's World Backup Day announcement.
Keep copies that can fail independently
Use the 3-2-1 backup approach as a planning framework. Keep three copies of the library, store them on two kinds of media, and hold one copy off-site. For home photos, a workable setup looks like this:
- Working collection: The verified originals on your computer.
- Local backup: An external drive you plug in for the backup, then disconnect and store.
- Off-site protection: A separate cloud backup or a drive kept in a different location.
Size that drive for growth over the next few years, not only for this import. The guide to external drives sized for photo backup compares practical storage options for larger libraries.
Placement counts as much as quantity. A drive sitting next to the laptop will not survive the same theft or fire. Synced folders can also mislead, since a deletion on one device can propagate to the other under the same account instead of leaving an independent recovery copy.
Recovery test: Open a photo directly from the backup. A job that reports success proves less than one file retrieved, viewed at full size and played if it is video.
If backup settings or separating synced files from protected copies gets confusing, backup support from Nerds 2 You Edmonton explains common setup options. Keep the routine plain enough to repeat. Simple survives.
Run a Test Batch Then Make It Monthly
Create a dated event folder today and transfer a small selection with your chosen method. Include a normal photo, a video and any less-common format you use. Time that batch so you can plan the full session around your actual equipment, not a cable's advertised speed.
Check the destination before starting the remainder. Confirm that the files are present, open the still image at full size, play the video and inspect the embedded capture date. If something looks wrong, change the setting or connection while the problem is still manageable.
Give each session a clear finish
Use a repeatable routine rather than importing into whichever folder happens to be open:
- Name the destination consistently. Use a shooting date and recognizable event, not an ambiguous folder called New Photos.
- Track the import boundary. Record which shooting dates or files you've already copied so later sessions don't create unnecessary duplicates.
- Finish with the backup. Copy the verified new folder to your independent storage before treating the session as complete.
A simple digital photo organization system makes those boundaries easier to maintain. Once a month, bring over the new files and check that the backup remains readable.
Start with a test batch today, then put the next session on your calendar. A modest routine you repeat is more useful than an elaborate archive you never update.
Tech Today offers practical guides that make everyday device tasks easier, from setting up a new iPhone after Android to updating an LG Smart TV. Visit Simply Tech Today for clear walkthroughs that help you handle your next transfer, setup or troubleshooting job with confidence.


Member discussion